You’ve spent hours picking perfect bunches of thyme, and now you have an abundance of plants. But how do you know which ones are still worth keeping?
Thyme is one of those herbs that people either love or hate — there isn’t much middle ground when it comes to this bright green herb with purple flowers. While some people swear by its medicinal properties, others think they can go without it entirely because they don’t like cooking with it. If you fall into the latter group, we understand. The best thing about thyme is its versatility: It works well on everything from salads to roasted meats. And since thyme grows easily in pots, containers give you more flexibility for where you want to put your plants (and what kind). Here’s our step-by-step guide to reviving dead thyme plants so you never need to throw them away again.
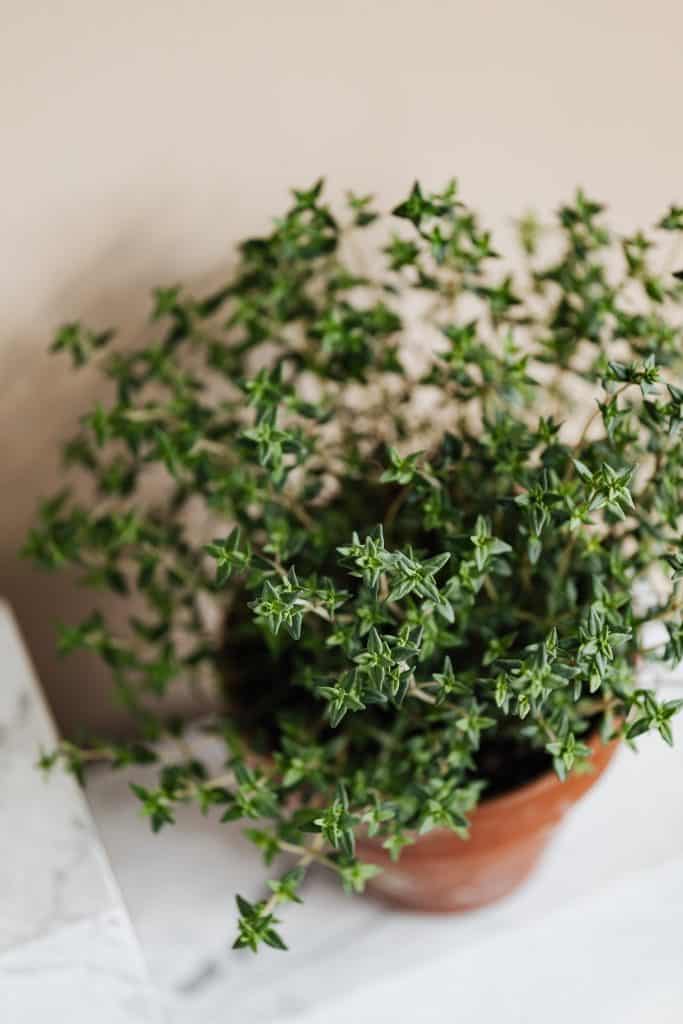
Table of Contents
How to keep a thyme plant healthy
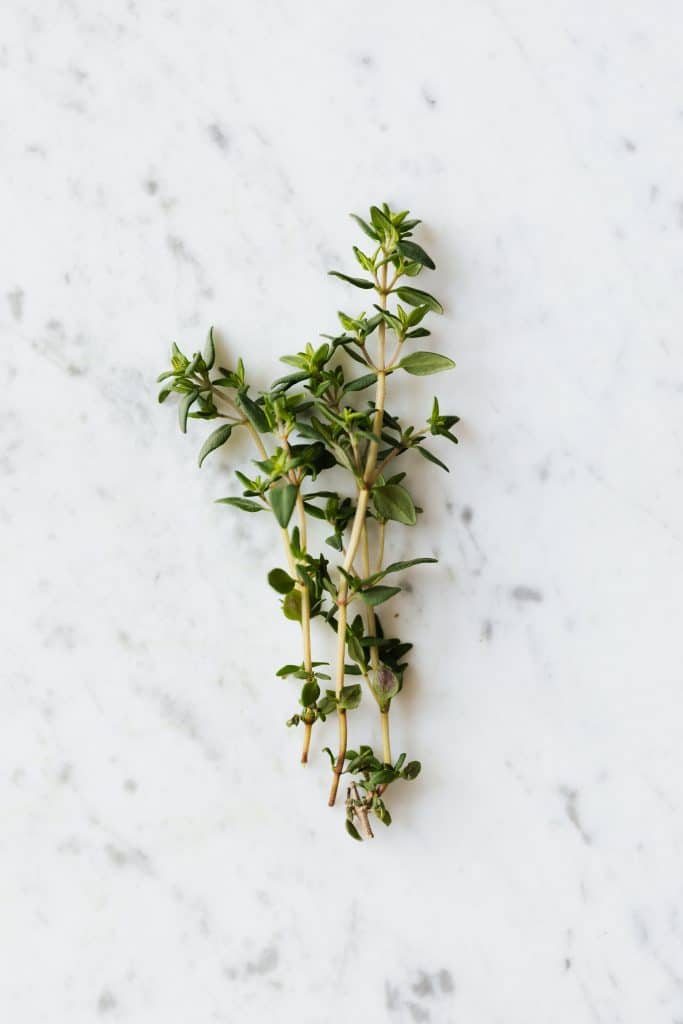
There are two types of thyme: fresh and dried. Fresh thyme has smaller leaves than dry thyme, but both varieties should be treated similarly. Both require good drainage as well as plenty of water. Water deeply once per day instead of spraying the foliage often. This will help prevent root rot and promote stronger growth. Also, if possible, remove stones and other debris from around your pot before planting. They could suffocate your roots. Once planted, make sure to space out new additions to avoid overcrowding. Keep the soil moist at all times, especially during hot weather months. You may notice small white dots forming on your plant’s leaves. These spots are actually tiny fungi called powdery mildew. To treat it, spray affected areas with vinegar or rubbing alcohol mixed with dish soap.
How to stop Thyme from going brown
this week, I noticed that my thyme plants are starting to turn brown. They look like they’re dying! Is there anything I can do?
It sounds silly, but your question has me worried because the answer could be as easy as water or as complex as fertilizer. The truth of the matter is that you’ve probably just grown older (which would explain why your plant looks so old), and that means your plant will need more attention than when you first started growing them. But don’t worry, we’ll get through this together, and by the end, you should have healthy green thyme flowers again.
First off, let’s talk about what causes your thyme to turn brown in the first place. There are several factors that can cause this problem. If you live somewhere hot and humid, then chances are good that your thyme might be suffering from fungal infection. Fungal infections can also occur if you don’t give your garden the right amount of sunlight, which can lead to disease. Another common reason for brown spots on your thyme stems is over-watering. You see, watering too much can make your leaves become stressed, which leads to leaf drop and stem discoloration. This symptom is usually caused by overwatering, not under-watering. So check out your watering schedule, and make sure you aren’t giving your plants too many water droplets at once. Also, try to keep your soil moist enough but not soggy. Moisture levels between 50% – 70% are ideal for most plants. If you notice any signs of wilting, take action immediately.
Now, let’s move onto some tips to help prevent your thyme from turning brown. First things first, make sure you’re using fresh thyme instead of dried. Dried herbs lose their potency over time, and although many people use them, they may actually be doing harm to your plants. Just imagine how many times you’ve used up those little packets of thyme herb before opening the package for the third time? Now think about how many different chemicals could have accumulated within those small packages. That same chemical buildup can happen to your plants, too. It’s best to buy fresh whenever possible, and if you really want to save money, grow your own. However, if you’d rather buy pre-packaged thyme, make sure you purchase organically grown thyme. Organically grown thyme doesn’t contain pesticides, and if you’re looking for something natural, organic is definitely the way to go.
Next, make sure you rotate your thyme every year. One thing you should always remember is that thyme likes lots of sun exposure, especially during the springtime when new growth begins. If you’re planting new thyme seeds, make sure you sow them in the fall so they have plenty of sunshine to sprout before winter hits. Make sure you pay extra attention to your thyme during the hotter months as well. During these warmer seasons, you’ll want to make sure to water often to avoid dehydration. In fact, you should never stop watering during the summer months. Your plants won’t be able to fully absorb nutrients without water, so make sure you water regularly throughout the season.
And finally, if all else fails, you can also mix 1/4 cup of Epsom salt into each gallon of water your thyme requires. Epsom salts are known for their antiseptic properties, which makes them great for disinfecting everything from insect bites to cuts. Simply soak your thyme in a mixture of Epsom salts and water until it reaches full coverage. Then simply rinse your thyme thoroughly and allow it to dry completely. Once it’s dry, store it away in a cool dark location and watch it grow strong and vibrant.
So now you know what causes your thyme to turn brown, but why does it even happen in the first place? Well, the culprit behind this issue lies within the chlorophyll molecules found in thyme leaves. When exposed to high temperatures, chlorophyll molecules start breaking apart, which allows harmful free radicals to form. These free radicals damage cells within the leaves, causing brown patches to appear. To prevent this process, you can cut back on watering during the hottest hours of the day, and avoid exposing your thyme to direct sunlight. You can also apply a thin layer of petroleum jelly to your thyme leaves to protect against heat. Finally, you should also consider purchasing organic thyme varieties that don’t produce chlorophylls as easily. Organic varieties of thyme are also known to be resistant to pests and diseases, so you can rest easier knowing your plants are safe from insects and fungus.
And that’s it! Hopefully this information was helpful, and you can put this knowledge to good use to ensure your thyme stays healthy and beautiful.
Where to place a thyme plant in the garden
A popular misconception is that thyme only thrives outside. However, this couldn’t be further from the truth. Thyme loves warmth and moisture alike. So while some prefer to stick their potted thyme plants inside during cold seasons, these hardy little seeds produce better results growing outdoors. Place them near trees or shrubs that provide shade during warm summer days, or under evergreen bushes during winter months. Make sure not to let your plants sit too long next to heat sources like fireplaces and ovens due to the risk of burning. Remember also that different kinds of thyme grow best in varying climates. For example, lemon thyme prefers cooler temperatures, while rosemary requires warmer conditions. A general rule of thumb is that you can move thyme indoors anytime between late September and early May.
Still unsure whether you’re ready for transplant?
Try giving your plant a home quiz first. After watering thoroughly, cut off any excess twine from the bottom of each stem. Then simply wrap the stems tightly with the string. If you find yourself needing additional support later down the line, use bamboo stakes. Be sure to bury the ends flush with the soil. Lastly, take care of your newly transplanted thyme. Treat them with insecticides every month to ward off pests. Continue feeding your garden throughout the season using organic fertilizers. That said, after harvesting, store them properly until you’re ready to replant them back up. Don’t forget to prune away damaged branches and stalks. As far as removing the entire plant goes, keep in mind that some varieties of thyme are invasive weeds elsewhere. When replanting your revived plants, just remember to choose another spot in your yard.
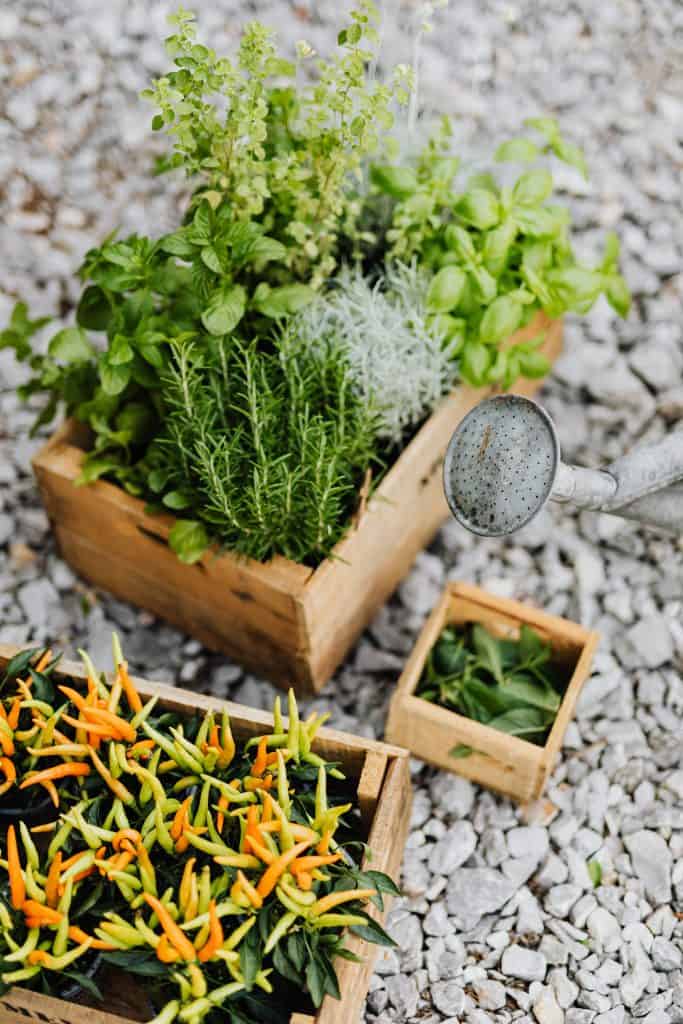
What else can i plant alongside Thyme?
Thyme is a culinary powerhouse. It has so many uses, from cooking and baking all kinds of foods, to making your own pesto. But did you know it also makes for an excellent companion plant? Planting this aromatic herb near other veggies or leafy greens can help them stay healthier while keeping bugs away. Here’s why we think thyme pairs especially well with some specific types of food crops, including tomatoes, potatoes, carrots, cucumbers, lettuce, kale, peas, beans, radishes, beets, cabbage, onions, garlic, peppers, asparagus, chard, spinach, and more.
Good herbs that grow well with thyme
While there are hundreds of varieties of thyme (and even heirloom versions), most work pretty much everywhere in the garden. We tested several common ones at our farm over the last few years and found they do particularly well when planted among certain vegetables like green beans or tomatoes.
Here are just a few examples of what works well together on our farm:
Cilantro/coriander – This super-popular herb loves heat and moisture—perfect conditions for growing alongside hot pepper plants. In fact, cilantro was one of the first edible flowers to bloom during the 2016 summer solstice. It’s easy to see how its flavour would be enhanced by sweet bell peppers, but you could experiment with adding different colours of bell pepper if you prefer. Cilantro grows up to 4 inches tall and gets about 8 hours of sun per day. Look for seeds labelled “seeds of the month” or buy small starts indoors starting around April 1st. You will need to wait until spring before planting outside. If you start cilantro indoors early enough, you should have young transplants ready to go into the ground by mid-May. For seedlings purchased directly from a greenhouse supplier, transplant outdoors once temperatures consistently reach 50 degrees Fahrenheit. Once established, keep watering these hearty little plants every two days instead of weekly feedings.
Chives – There may not be another vegetable whose taste tastes better with fresh chive blossoms than scallions. Chives love full sun and moist soil. They won’t mind being disturbed occasionally throughout their lifespan, which varies depending on where you live. Like cilantro, they were one of the very first edible flower species to blossom back in late June 2017. The long stems of larger varieties of chives make great cut flowers, too!
Lavender – One way to use lavenders sparingly is to try mixing in some chopped leaves of basil or mint right after harvesting. Lavender likes rich, fertile soils that drain well. While it prefers full sunlight, it doesn’t require nearly as much attention as many other perennials. Try planting it among longer plants like artichokes, fennel, or cornflowers.
Rosemary – A classic kitchen staple, rosemary thrives in full sun and drier, slightly acidic soil. It requires less water than other herbs and enjoys regular pruning and dividing. Rosemary does well in containers or pots. Sprays of this fragrant evergreen come attached to a spiky stem, which helps deter slugs and snails. Its large clusters of tiny purple berries attract birds. To harvest, simply pinch off any dead branches along the base of the plant, then dig out the entire root ball. When planting new roots, don’t forget to take the original pot with you.
Plants to grow next to thyme
If you want to get really creative, consider planting some thyme next to the following plants:
Tomatoes – Thyme’s natural insect repellent means fewer pests later in the season. Plus, this versatile herb offers lots of ways to prepare delicious tomato dishes. Add dried thyme to pasta sauces, soups, marinades, and salads. Use fresh thyme to top roasted meats and fish, add it to sandwiches, mix it in egg salad, sprinkle it on bruschetta, or toss slices with olive oil and vinegar. Fresh thyme goes well with cherry tomatoes, beefsteak tomatoes, grape tomatoes, yellow pear tomatoes, Roma plum tomatoes, slicing tomatoes, and roma paste tomatoes.
Potatoes – Potatoes are known for producing tasty sprouts and foliage. Adding thyme encourages potato sprouting earlier in the year. And because this hardy perennial usually only needs a bit of thinning each fall, it gives potatoes room to expand without crowding out valuable nutrients. On average, you’ll pull up half of the aboveground parts of thyme when pulling weeds. As such, planters, borders, and pathways are ideal spots for thyme to spread across beds and gardens alike. Because thyme is widely used in French cuisine, it blends nicely with the flavours of everything from potatoes cooked au jardinière to ratatouille.
Carrots – Carrot tops produce strong, spicy shoots that resemble oregano. Their intense flavour complements parsley, dill, tarragon, sage, and chervil. Choose a variety called ‘Nantes’ or ‘Purple Haze’ for maximum aroma. Keep caraway and coriander aside for carrot cake batter, mashed potatoes, hummus, dips, sautés, stir fries, curries, braised lentils, risotto, and anything else savoury.
Onion sets – Some onion sets will send up blooms in addition to bulb sets. These include ‘Yellow Pearls’, ‘White Pearl’, and ‘Sweet White Globe’. All three varieties are compact and productive. Sweet white globe produces mild flavoured bulbs. Yellow pearl onions are smaller than round onions. Both tend to mature within about 60 days after planting. After they finish flowering, remove the spent stalks. New growth appears in mid August through October. Harvested onions must sit overnight in cold salted water. Dry thoroughly before storing.
Garlic – Garlic is often grown under row covers to protect itself from deer, rabbits, squirrels, raccoons, and birds. But since thyme repels aphids, mites, beetles, mealybugs, and powder post beetle larvae, leaving the mulch open allows the beneficial insects access to the clove heads. Many gardeners who choose to cover their garlic believe using black plastic film will block light needed for photosynthesis. However, studies show covering the cloves with clear polyethylene sheeting actually increases yields. This practice protects against fungal diseases caused by dampness and excess rainwater accumulation.
Radish – Radishes aren’t exactly big time producers of flavourful foliage, but they certainly give ample warning that they’re coming into your garden. Most varieties grow between 2 and 6 inches wide. Even though they seem short, they’re still able to provide good shade when necessary. Unlike turnips and broccoli, radishes don’t store well, so eat them soon after picking.
Beet – Beets are generally slow growers. That said, they benefit greatly from having nearby companions, especially those with similar metabolism like brassicas. Like radishes, beetroot stores poorly, so pick yours sooner rather than later. Also, watch out for slug damage. Make sure to sow the seeds ½ inch deep and 3 feet apart if sowing annually. Thin seedling to 5 inches apart once the second true leaf comes up.
Asparagus – Just like beets, asparagus is susceptible to slugs. Slugs like cool weather, wet environments, and shade. Soil surrounding asparagus should be kept evenly moist and loose. Cover the crowns with straw or hay and poke holes in the bottom. Set clay tiles or bricks underneath the bedding material to create raised beds. Or, lay thick layers of newspaper down. Fungal disease poses no problem for asparagus. Rather than fertilizing with compost, apply fertilizer directly onto the crowns.
Kale – Kale is extremely sensitive to frost and wind. Protect tender outer leaves with floating row cover fabric secured tightly with rubber bands. Sow seeds 1 foot apart and space rows 12 inches apart. Dig trenches 18 inches deep, 7 inches apart. Fill the trench with aged manure and cover with soil. Water deeply and let stand undisturbed for five weeks. Then, till lightly and cultivate regularly.
Peas – Pea vines appreciate plenty of nitrogen, phosphorus, potassium, and micronutrients. They enjoy warm temperatures, moderate humidity, and abundant rainfall. Since peonies and roses both attract hummingbirds, try pairing them with taller flowers like snapdragons, zinnias, cosmos, nasturtiums, calendula, or pansies.
Spinach – Spinaches thrive in full sun and sandy loam soil. They need high amounts of nitrogen, phosphorous, magnesium, zinc, iron, calcium, and manganese. Space plants 10 inches apart. Mulching promotes healthy roots. Start seeding in flats in March. Transplant outside in May. Pick individual leaves to prevent bolting. Remove old tips and lower hanging strings to encourage bushing.