This one’s easy. They will die! If they get thirsty they might survive if they are watered frequently enough, but your plant won’t be happy at all. You can try making them more drought-resistant, but really the best thing to do is simply keep watering them less often. Watering once every two days seems like plenty to me, especially during the hottest part of the year.
If you’re worried you probably don’t need to worry because you grew these beauties from bulbs. Bulbs are hardy little things and will usually make it through most difficult conditions. However, if you live in a climate where temperatures exceed 85 degrees F (30 C) then you may want to check out their specific requirements to avoid any unnecessary suffering.
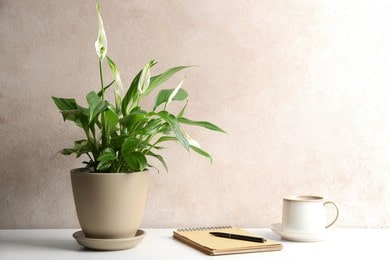
Table of Contents
Step by step guide to fix an overwatered Peace lily:
So now that we know why this particular flower is unhappy with us let’s take a look at what we can do about it. First off you need to figure out what exactly went wrong. Did the pot dry out first before you added the soil mix, which contained very fine sand particles that sucked the moisture right out of the roots? Or did the seeds sprout early and crowd each other close together? Either way you can fix it pretty easily.
Remove the excess soil mixture using either a spoon or just your hands. This should help give everything room to grow larger. Then add new dirt and use a trowel to spread it evenly around. Wetting the surface again will ensure good contact between the roots and the fresh dirt. That’s it! Now move onto the next garden spot on your property or wait until next spring to replant your potted plants.
You could also try giving your flowers a break and letting them go dormant. Many people think that keeping a houseplant alive throughout the winter months gives them extra life later in the growing season. In fact it’s much better for the plant to rest, even going dormant than to struggle through the heatwave that occurs almost yearly here in SoCal. Keeping your plants healthy makes them stronger and helps them produce bigger blooms come April.
But if you still feel guilty about killing your poor flowers then consider taking them inside and putting them on top of your refrigerator for a few hours. With the cooler air temperature, your plants will require fewer nutrients and won’t demand nearly as many hydration cycles from you. Your plants will love being cooped up and having a nice chillier home environment. Just remember to bring them outdoors again soon. Even though they aren’t flowering, they are still producing leaves and stems, and those parts will continue to dehydrate unless given regular access to water.
In addition to removing excess water, adding mulch can be helpful in preventing further dehydration. Mulching reduces evaporation rates, allowing your plants to conserve precious water resources and extend their longevity. Plus mulched beds tend to stay warmer during the hotter times of the year, reducing the amount of stress your plants endure.
Lastly, if you’re looking for another reason to stop watering your Peace lilies, you should know that they are highly sensitive to salt accumulation in the soil. Excess salts build up under the foliage and affect photosynthesis. As a result, the plant slows its growth rate and produces smaller blooms. So maybe leave the watering responsibilities to someone else and concentrate on cleaning the yard of rocks and debris instead.
Do Peace Lilies need sunlight?
Yes, peace lilies require direct sunlight at least part of each day. This helps them absorb essential nutrients from sunlight. Without adequate amounts of natural sunlight, your peace lily may start showing signs of stress such as leaf drooping and reduced flowering. If you live somewhere sunny year round, then there shouldn’t really be any problems. But if you live in northern climates like myself, then you might want to consider moving your peace lily indoors during colder months. During wintertime, some varieties won’t bloom properly unless placed under artificial lighting. Check out our guide on keeping a tropical garden alive through cold weather.
Should I mist my Peace Lily?
While watering your peace lily regularly isn’t necessarily harmful, doing things wrong can cause serious damage. You probably know that plants need regular moisture to stay healthy. However, there are many different ways to give your plant moisture including using overhead sprinklers, drip hoses, spray bottles, etc. While most homeowners choose to use one method exclusively, others mix up their watering routine to try and maximize growth potential. In general, experts recommend watering once per week until new blossoms appear, then twice weekly afterward. Water the pot first before adding any extra liquid to help prevent runoff into the surrounding dirt.
But what about mister sprays?
Do they work? Yes, misting your peace lily does increase humidity levels around the foliage while eliminating dust buildup. Mist only lightly, however, since too much water can drown young seedlings. For best results, invest in a small irrigation kit suitable for growing potted plants. Using a low-pressure hose, avoid spraying directly onto the leaves themselves because this causes fungus infections. Just aim the nozzle towards the base of the pot and make gentle circles around it. Once finished, gently pat down the excess moisture left behind. Avoid soaking wet pots otherwise, all the air bubbles created during watering will pop leading to root rot. Remember, no matter what kind of container you purchase, plan to keep your plant away from large animals and pets who tend to knock things over.
So now you understand why we messed up our poor little guy, let’s take a look at what exactly went wrong. As mentioned earlier, the problem started when we decided to change his location. After moving him closer to the window, he was exposed to increased heat throughout the day. Since the temperature got higher, so did the amount of available water inside the pot. When combined together, excessive temperatures and lack of proper drainage caused a perfect storm for death.
As soon as we moved the pot, we forgot to adjust the timer on the lights above. He had gotten used to having lots of time outdoors every single day, so suddenly he found himself trapped indoors with nothing to do. By the end of the night, his roots were completely covered in mold due to constant dampness. Next thing you know, he’s shoving away at the plastic wrap covering the top of the pot. Fortunately, we caught it right away before anything truly disastrous occurred.
In hindsight, we learned something very important: Always check your plants daily before giving them additional resources such as food, water, and/or sunlight. Take note of changes in behavior, as well as physical appearance. Is the bottom half starting to wilt? Are the stems getting thicker? Does it seem like the center hasn’t grown as quickly as the edges? These symptoms are easily mistaken for normal characteristics associated with aging, but sometimes it pays to pay attention. Another common mistake made by amateur gardeners is waiting too long before making adjustments to a sickly plant. Don’t wait weeks to replace old bulbs with fresh ones, or cut back branches that look dried up. Even if you think the plant looks okay, it’s better to err on the side of caution. Your health depends on it.