It usually happens when a fern drowns or the humidity is too low, which dehydrates the leaves and causes them to become brown and crispy. To prevent the leaves from turning brown and dying, indoor ferns need soil that is continually moist, and they like a humidity level of 50%.
The majority of indoor ferns, including Boston, Maidenhair, Birds Nest, Rabbit Foot, and Asparagus Ferns, are indigenous to tropical climates where they flourish in high humidity, continuously moist soil, cool, constant temperatures, and shaded areas under tree canopies.
It’s crucial to recreate the fern’s natural environment in order to bring it back to life. To do this, you should raise the humidity, put the fern in moist organic soil, and place it in a shaded spot with a consistent, moderately cool temperature.
| Conditions: | Fern died for this reason: |
| reduced humidity | Indoor ferns require a minimum of 30% humidity. Most ferns cannot survive in the dry air inside homes. |
| Dry Ground: | Ferns need soil that is continually damp. Due to the drought and low humidity, the leaves turn brown and crunchy. |
| A lot of sun: | Ferns favor some filtered light or shade. Brown, withering leaves are a result of too much sun. |
| Unacceptable Airflow: | Ferns become drier due to forced air, drafts, convection currents, and heat sources. |
| Saturated Soil: | Ferns need soil that is damp but has good drainage. Root rot results from saturated soil. |
| Temperature: | For ferns grown indoors, the ideal temperature range is 65°F to 75°F. Depending on the temperature, ferns can die. |
| Outside Ferns | Outdoor ferns that are dying include those that are grown in soil with a low organic content, rapid draining sand, excessive wind, and too much sun. |
Continue reading to find out the causes of your indoor and outdoor fern’s demise and how to put the answers into practice to bring it back to life.
Table of Contents
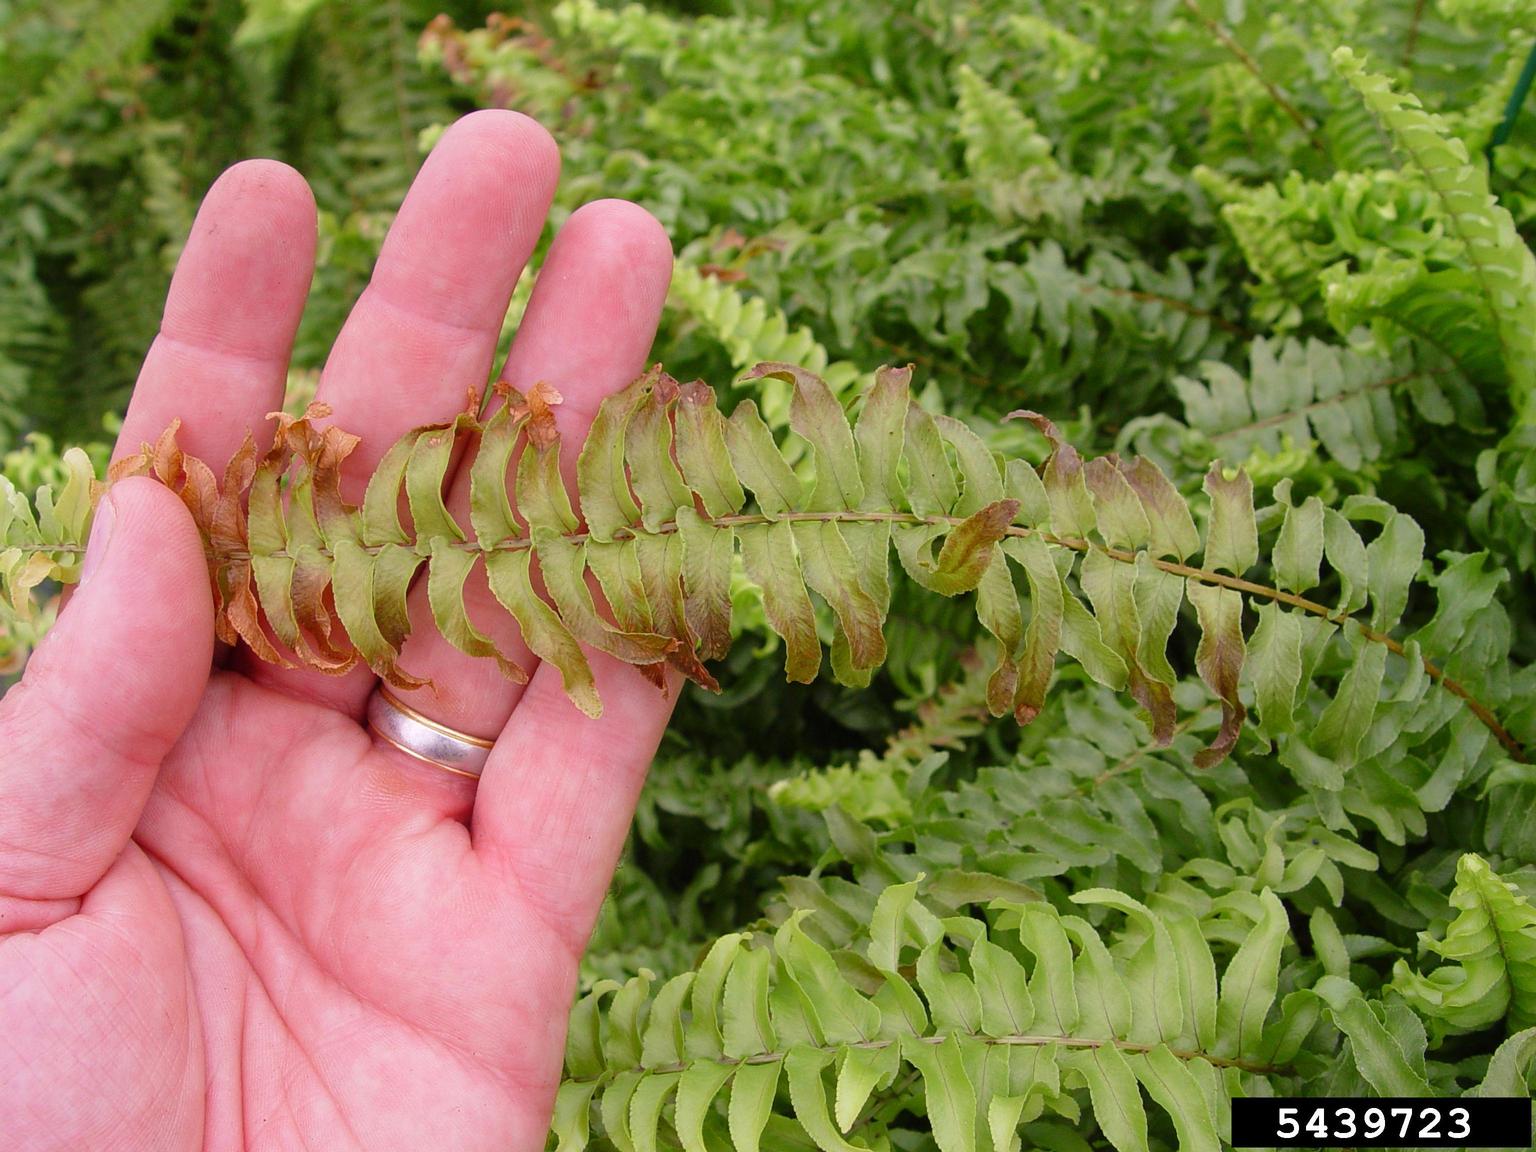
Fern Turning Brown, Drying Out and Dying (Indoors)
- Symptoms. Fern leaves appear brown when they dry up. Frequently, only the tips of the ferns’ leaves become dry and brown.
- Causes. Low relative humidity, hot temperatures, a lot of air movement (from air conditioning or convection currents from central heating), too much sun, or because of submersion.
High temperatures, underwatering, or low humidity are the causes of ferns becoming brown. Ferns require soil that is moist but not saturated, humidity levels between 50% and 70%, and temperatures between 65°F and 75°F. Ferns become brown as a result of stress caused by low humidity, extreme heat or cold, or dry soil.
Because ferns of all species want a humidity of at least 30%, yet the air in most homes typically has a humidity of 10%, low humidity is the most frequent cause of ferns turning brown. It is this dry air that causes the leaves to become brown.
In stark contrast to their natural surroundings, where relative humidity can reach as high as 70%, ferns are woodland plants that thrive in the shade of woodlands and forests. They do not tolerate dry air or drafty parts of the home.
Low humidity is typically brought on by:
- excessive sun
- elevated temperatures
- conditioning or forced air
- sources of heat inside
- drafts caused by doors that are opened and closed or heat currents that circulate throughout the house.
As a result, the ferns typically become brown at the tips, and the leaves (or blades) become crispy and wither away. Some species, including Boston ferns, respond to humidity levels lower than 30% by dropping their leaflets or becoming brown.
Underwatering is the second most frequent reason for ferns to turn brown and die, right after low humidity.
For ferns to stay green, the soil must be regularly and equally moist.
If the soil becomes dry in between waterings, the leaves get brittle and brown and appear to be wilting.
Only when they are actively growing or if the leaves are a light green color do ferns need small amounts of fertilizer (which indicates a lack of available nutrients).
Fertilizer can burn the fern’s delicate roots if it is administered too frequently or in excess concentration, which makes the fern’s tips become brown and appear to be dying.
How to Revive Brown, Drying Out, Crispy Fern Leaves
Create a humid microclimate around the fern in your home to mimic the humid circumstances of the fern’s natural environment in order to revive ferns with browning and dried-out leaves.
- Put your fern in a space that has a higher humidity level naturally, like a bathroom or kitchen. The air in a bathroom is typically much more humid than the air in any other room in the house, and it most closely reflects the humidity found in the ferns’ natural habitat. This causes less water to evaporate from the leaves and keeps them from drying out.
- Put the potted fern on a saucer or tray that has water in it but is supported by rocks. The water in the area under and surrounding the pot evaporates, creating a humid microclimate that mimics the ferns’ preferred natural humid conditions and keeps the leaves from becoming brown. Keep the pot above the water line to prevent root rot from occurring from the soil getting too wet.
- Water ferns regularly, but not until the soil is completely wet. Ferns thrive in soil that is rich in organic matter and has good drainage so that the roots are not seated in soggy dirt. This soil maintains moisture around the roots over time. Plant ferns in good compost that is rich in organic matter, and water as often as necessary to keep the soil evenly moist (exactly how often depends on your climate and conditions, but if the leaves are dying and turning brown while the soil feels a little dry, you are probably underwatering your fern).
- Never water ferns lightly; always give them a full soak. A generous watering ensures that moisture enters the fern’s roots where it is needed, where it may subsequently be transported by the roots to the leaves to prevent browning and crispying. Too little watering results in moist potting soil on the surface but insufficient water penetration to the roots. Always water deeply, letting extra water drip from the pot’s base.
- Keep the fern out of direct sunlight and place it in a shaded area. Find a space in your home that is not exposed to direct sunlight as this will scorch the leaves and dry out the soil, resulting in brown foliage. Ferns do best in shady areas.
- Instead of using hot or cold water to water the fern, use lukewarm water. The majority of indoor ferns are tropical plants, so providing them with lukewarm water mimics their natural environment. Their delicate roots may experience shock if the water is excessively cold, which may contribute to the leaves becoming brown.
- Place the fern away from any air currents or draughts caused by forced air systems or air conditioners. The heating and cooling systems’ on-and-off cycles produce varied conditions for ferns that lead to plants turning brown as an indication of stress as the temperature changes throughout the year. To lessen water loss from the leaves, place your fern in an area without drafts.
- Increase the number of plants in the area to increase the humidity. By clustering multiple leafy houseplants together, you can assist create a humid microclimate around your fern that can help it recover and mimic the kinds of growing circumstances it would experience in its native habitat.
- A humidifier is the best thing you can do to revive ferns. This is unquestionably the finest technique to mimic your fern’s original humid environment and generate the humid conditions around it. Since a humidifier allows you to accurately adjust the humidity % to the ferns’ preferred range, you can attain the ideal degree of humidity for ferns to flourish. many humidifiers A humidifier is far more successful at restoring your fern than other methods of increasing humidity.
- A humidifier is frequently preferred over misting ferns with a spray bottle because spraying some fern species might raise the risk of foliar leaf spot disease if the leaves are continuously damp from regular misting.
- Use a good pair of pruners to remove any brown growth and promote the growth of healthy, green growth. The brown fern leaves never regenerate, but cutting them down can encourage fresh, healthy growth and enhance the aesthetic of the plant.
With a few little tweaks, you can successfully mimic the fern’s natural environment, which decreases water loss from leaves and keeps them from drying up and becoming brown.
When the environment is right for ferns, the plants should revivify. New growth should appear during the growing season, albeit some growth may still be crispy, especially at the tips.
Fern Turning Yellow and Drooping
- Symptoms. Ferns’ yellowing and drooping leaves.
- Causes. excessive irrigation, causing the soil to get saturated rather than remain continuously moist. pots without base drainage holes. Water collects around the fern’s base as a result of the saucers and trays being used underneath the pot to impede adequate drainage of surplus water.
Because of excessive watering, the soil becomes overly wet and causes ferns to become yellow. Ferns demand soil that is regularly moist while still having good drainage. The fern’s leaves turn yellow and droop with a withering appearance if the potting soil becomes too wet.
Ferns naturally grow in rich, organic soils that hold onto moisture while also having a well-draining structure that directs extra water away from the roots and keeps the soil around them from becoming soggy.
The potting soil being overly moist around the ferns’ roots is by far the most frequent cause of ferns turning yellow and drooping. Typically, there are three causes for this:
- Overwatering causes the soil to become saturated rather than just constantly moist.
- By placing trays and saucers underneath the pot, water collects around the base of the container, making the soil around the roots soggy.
- the usage of ornamental outer pots without drainage holes, which leads to standing water collecting around your fern’s roots.
The water limits root respiration and eliminates oxygen from the soil, which interferes with the roots’ ability to absorb moisture and nutrients if the soil around the fern’s roots is persistently wet.
The fern’s leaves will turn yellow and droop as a symptom of stress if the roots are unable to absorb moisture and nutrients to convey to the leaves.
The fern’s leaves turn yellow, droop, and eventually die back if the roots are left in wet soil for an extended period of time.
But it should be emphasized that while soggy soil and root rot are the most frequent causes of yellow fern leaves, due to the variety of indoor ferns (the majority of which are tropical), yellow leaves can also be an indication of stress from low humidity.
How to Revive Dying Indoor Ferns with Drooping, Yellow Leaves
- As often as necessary, water your fern to keep the soil constantly damp but not soggy. The size of the fern, the relative humidity in the space, and how effectively your potting soil retains moisture will all influence how frequently you should water ferns. Avoid giving your fern a daily bath because doing so will cause the oxygen in the soil to escape and rob the roots of oxygen, which will hinder root respiration.
- Plant ferns in organically rich potting soil. The roots of the fern need a continuous supply of moisture, and good potting soil with lots of organic matter helps to hold on to that moisture while having a porous structure that allows for efficient drainage of excess water to prevent water logging. Check to make sure the pots’ drainage pores are not blocked and think about switching your potting soil if you notice that your soil is draining particularly slowly after watering.
- Ferns should always be grown in pots with drainage holes at the bottom. Although ferns can tolerate persistently moist soil, plants also need sufficient drainage to prevent root rot. To let extra water to drain, choose a pot with drainage holes in the base.
- To prevent yellow leaves, make sure trays and saucers placed underneath your potted fern do not obstruct water drainage from the soil. Ferns need a lot of humidity, thus it’s advised to set your indoor potted fern on a tray with water and use pebbles to raise the pot over the water line. To ensure that water can effectively drain from the drainage hole and does not collect around your fern’s roots, there must be space between the water line and the base of the pot.
- After watering, remove any extra water from the decorative outer pots. Planting the fern in a sturdy pot with drainage holes in the base and then enclosing the container in a larger, prettier outer pot is a typical error made when cultivating indoor plants in general. The issue is that the exterior pot frequently lacks drainage holes, which leads to standing water collecting around the roots and turning the leaves yellow from root rot.
- Verify that no compacted soil has obstructed the drainage openings in the pot’s base. Compacted soil at the pot’s base has the potential to significantly delay drainage, leading to root rot. Repotting your fern to a new pot with new soil to allow for excellent drainage after watering is advised if the soil drains slowly after watering and the drainage holes are plugged.
- With a sharp set of pruners, remove any yellow leaves since this growth won’t come back. Pruning encourages new development, guards against fungal issues, and enhances the aesthetic of the plant. This encourages fresh, wholesome green growth. To stop the spread of fungi to otherwise healthy growth, wipe the pruner blades with a towel dipped in disinfectant after each cut.
Correcting watering procedures to keep the soil constantly moist but not saturated and making sure water does not collect around the roots will help the fern recover if it is drooping and turning yellow.
The fern is likely to experience root rot and eventual death if its roots are left in wet soil for an extended period of time.
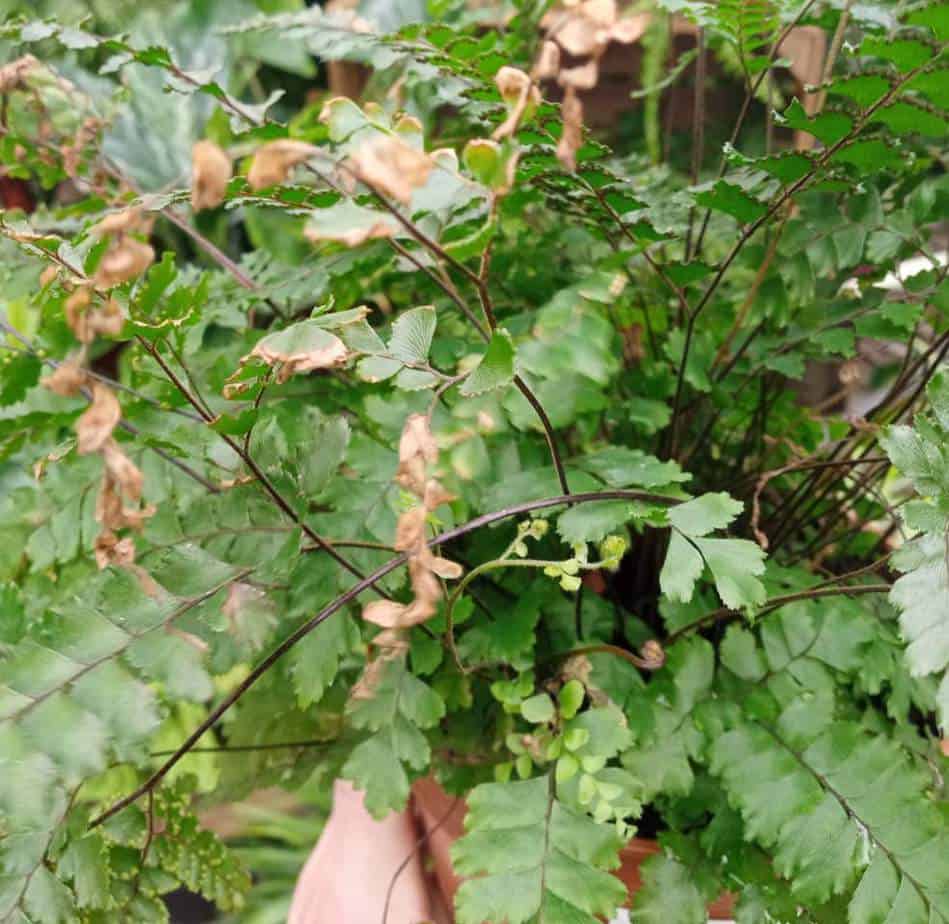
Why is my Indoor Fern Losing Leaves?
- Symptoms. falling leaves or leaflets that may also become brown and crusty.
- Causes. Low humidity, underwatering, and unusually high or low temperatures affect tropical ferns.
Low humidity and underwatering are the causes of ferns losing their leaves. Tropical ferns that grow indoors demand continually moist soil and a humidity level of at least 50%. The fern sheds its leaves to help retain moisture if the air is too dry or the soil is too arid.
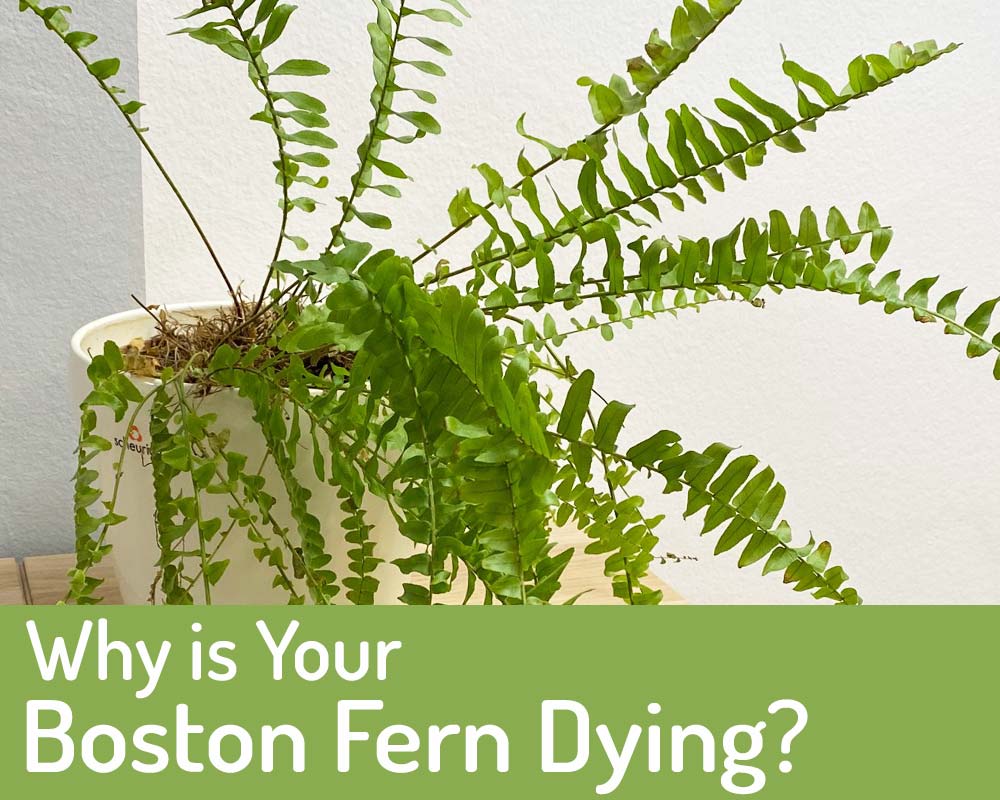
Boston ferns, Maidenhair ferns, Rabbits foot ferns, Holly ferns, and other common houseplant ferns are all native to tropical or subtropical regions of the world, where humidity levels are much higher than they are in most homes.
The fern’s leaves lose moisture to the dry air far more quickly than the roots can absorb it.
As a survival tactic to save resources, the plant responds by drooping its leaves or leaflets, which limits additional water loss.
One of the most frequent reasons of withering ferns is persistently low humidity.
Ferns frequently lose their leaves due to low or high temperatures that are significantly outside of their preferred temperature range of 65°F to 75°F.
Because the causes are frequently the same and point to an environmental issue, the symptom of ferns dropping leaves or leaflets frequently occurs in conjunction with the ends of the fern’s leaves turning brown.
How to Revive a Fern Losing Leaves
Underwatering, low humidity, and extreme heat or cold are the three most frequent reasons why fern plants lose their leaves.
A fern that is losing its leaves can be revived by increasing the humidity, watering more frequently to keep the soil continuously moist, and maintaining a temperature between 65 and 75 degrees Fahrenheit. Once these conditions are met, new leaves should begin to sprout.
- Using a humidifier will raise the humidity to 50%. A humidifier is the most efficient approach to raise the humidity surrounding your fern because you can adjust the humidity level with some humidifiers, accurately simulating the greater humidity levels seen in the fern’s native tropical environment. This lessens water loss from the leaves and fosters the ideal atmosphere for your fern to begin recuperating by generating new leaves.
- Mist your fern daily and place it near other potted plants. Your withering fern will thrive better if you cluster multiple plants close together to create a humid microclimate. The leaves lose less water when misted, and your fern shoulder begins to recover.
- So that the soil is regularly and equally moist, water the fern as often as necessary. There is no set schedule for watering ferns because it depends on the size of the plant and the relative humidity of the space. However, to make sure that the soil is moist but not saturated, I advise constantly probing the ground with your finger. Always water deeply, allowing excess water to flow out of the drainage holes in the pot’s base to confirm that the moisture has gotten to the roots where it is needed.
- To rejuvenate your fern, maintain a temperature range of 65 to 75 degrees Fahrenheit, with a slight drop at night. Low temperatures stress tropical ferns, and higher temperatures enhance evaporation, which increases the chance of leaves falling. In order for the fern’s leaves to regenerate, maintain the temperature within the ideal range to mimic the fern’s native environment.
- Away from heat sources, air currents, and drafts, keep your fern. Maintaining the proper humidity levels is crucial for your fern to recover, so keep it clear of drafts and away from artificial heat sources that might dry up the leaves.
The fern should recover under ideal environmental circumstances, and during the growing season, new leaves should appear.
Why is My Fern Dying Outside?
- Symptoms. dark, crunchy, and withering back leaves.
- Causes. Too much sunlight, swiftly draining soil, a lack of water, or an excessive amount of wind can deplete moisture from ferns.
The cause of a dying fern outside is cold weather, excessive sun, lack of water, or fast soil drainage, which prevents the fern’s roots from soaking up moisture and causes the fern to dry out and appear to be dying.
Ferns are a type of woodland plant that thrives in the canopy’s shade with only dappled or brilliant indirect light.
Due to their high sensitivity to direct sunshine, fern leaves quickly dry up and become crispy.
In addition to increasing soil evaporation and leaf water loss, direct sunshine also reduces humidity, making the climate unfavorable for outdoor ferns.
Due to the yearly fall of leaf litter, which acts as a natural mulch, ferns prefer continually moist soil with a high organic content.
The woods soil, which is permeable and rich in leaf litter, keeps a lot of moisture around the roots of the ferns while also allowing extra water to drain out so that the soil does not become soggy.
The roots of ferns cannot dry up enough moisture if the soil in your yard is too dry, sandy, or stony, which results in the leaves becoming brown from drought stress.
Outdoor ferns are not always evergreen, and in reaction to seasonal change, their leaves turn brown and appear to be withering in the winter.
While the leaves may wither in the winter, the rhizomes are protected by the soil and can grow fresh, healthy leaves in the spring.
How to Revive a Dying Outdoor Fern
The secret to saving dying outdoor ferns is to move them to an area of the garden with better lighting, wet soil that has been treated with compost, protection from wind, and regular irrigation to keep the soil consistently moist.
- Put the fern in the garden in a spot with improved soil. Before replanting the fern, amend the soil with a lot of leaf mold, compost, or manure to a depth of about 12 inches and a width of about 12 inches to allow for the root system. This preserves a lot of moisture and allows extra water to drain out, preventing the soil from becoming soggy. It also duplicates the soil conditions of the ferns’ natural habitat.
- Place the fern in a wind- and shade-free environment. The ability to flourish in your garden’s more shaded areas is one of ferns’ best qualities. The surrounding plants, trees, or building that provides the shade also serves as a wind break, preventing excessive amounts of moisture from being sucked from the leaves by high winds. The shade helps to limit water loss from the leaves and evaporation from the soil.
- To keep the soil constantly and uniformly moist, water it as often as necessary. The soil should be kept moist while the fern is dying or turning brown to aid in its revival. Once established and growing in the best conditions, ferns frequently do not require any extra watering.
- In the spring, spread a 2 inch layer of mulch all around the fern. The soil around the fern benefits from a mulch made of compost, leaf mold, and well-rotted manure because it improves soil structure, helps the soil retain moisture, and adds nutrients. Mulch is best applied early in the spring to maintain the soil’s ideal moisture level throughout the hot and dry summer.
- To keep your garden looking neat in the winter, trim back any browned, dead foliage. At the end of the fall, ferns’ leaves start to turn brown; at this time, you can clip them back with a good pair of pruners and compost the remaining parts. To give the fern a head start the following year, mulch can be applied on top of the fern to protect the rhizomes from frost and cold. In the spring, green growth should start to appear.
Why is My Fern Turning Light Green?
If the leaves on your fern are turning light green, this is not a sign that the plant is dying; rather, it is suffering from a lack of nutrients in the soil.
This may be due to a lack of fertilizer or because the fern has been in the same pot for too long and the roots have used up all the nutrients in the potting soil.
To assess whether you need to repot the fern, look to see if the roots are confined to the pot. If so, repot your fern with high-quality potting soil in the next largest pot available.
To rejuvenate your fern throughout the growing season, use an all-purpose liquid home plant fertilizer at half concentration (ferns can be sensitive to greater amounts).
Key Takeaways:
- A dying fern typically results from underwatering or low humidity caused by interior air currents. Normal indoor humidity is roughly 10%, while ferns need a greater humidity of 40%. The leaves become brown, crunchy, dried out, and look to be dying due to low humidity.
- Indoor fern leaves can turn brown due to low humidity, extreme temperatures, or very dry soil. Ferns favor soil that is continually moist, at least 40% humidity, and temperatures between 65°F and 75°F. Fern leaves get brown, dry, and crispy when the temperature is too high or the air and soil are too dry.
- Fern Overwatering results in yellowing and drooping of the leaves. The soil must be continually damp, but not saturated, for ferns to grow. The roots of the fern cannot extract nutrients and moisture from the soil if the soil is too wet, which inhibits the roots from doing their job of causing the leaves to become yellow and droop.
- Low humidity and dry soil are the causes of ferns losing their leaves. Tropical plants called indoor ferns need high humidity levels and continually damp soil. Ferns lose their leaves as a survival tactic to stop further water loss if the soil is too dry or the humidity is too low.
- A fading outdoor fern is typically caused by soil that drains too quickly, too much sun, or underwatering. Because they need to be shielded from the sun and wind, outdoor ferns thrive best under trees. To ensure that there is enough moisture to prevent the leaves from turning brown and dying, plant outside ferns on soil that has been amended with compost.
- Ferns turn pale green as a result of the soil’s deficiency in nutrients. The leaves turn light green and develop considerably more slowly if the fern has used up all the nutrients in the potting soil. The leaves can sometimes turn a pale green from too much sun.
- Emulate the fern’s natural environment as closely as possible by providing higher levels of humidity, shade, and water the fern as often as necessary to keep the soil continuously moist. To encourage new growth and revitalize the fern, trim back any brown, yellow, or withering leaves.
FAQ
How often should ferns be watered?
If you pay attention to getting the watering right, hanging ferns make excellent indoor plants and are simple to care for. Contrary to what you would believe, this is a lot simpler. Watering hanging ferns two to three times weekly is ideal.
What does an overwatered fern look like?
Yellowing or wilted leaves are frequently the first indication when a fern is overwatered. Touching the dirt with the tip of your finger is a guaranteed technique to tell when to water a Boston fern. It’s time to water the plant if the soil’s surface feels a little bit dry.
Will a dead fern come back to life?
Since most ferns are hardy plants, once the problematic conditions are fixed, they usually recover within a few weeks. The good news is that the fern will grow again in spring once the temperatures rise, even if it is dead now, which is typical in frigid temperatures during winter.
Why is my fern turning brown and dying?
Low humidity and drowning lead fern leaves to become brown. Ferns are tropical plants that require high levels of humidity. Indoor humidity is frequently too low, which causes the leaves to lose moisture and turn brown, crispy, dried out, and look to be dying.
Why are my indoor ferns dying?
It usually happens when a fern drowns or the humidity is too low, which dehydrates the leaves and causes them to become brown and crispy. To prevent the leaves from turning brown and dying, indoor ferns need soil that is continually moist, and they like a humidity level of 50%.