A dying hydrangea plant is frequently the result of dehydration, damage from frost, excessive sun exposure, or transplant shock. Make sure the soil is continually moist and offer protection from the midday sun to prevent hydrangeas from wilting and dying.
It’s crucial to replicate some aspects of a dying hydrangea’s natural environment in your garden, with a focus on soil moisture and shelter from excessive sun and wind.
The following are the main causes of hydrangea needing to be revived:
- Due to the drought, excessive sun, and quickly draining soil, the hydrangea is drooping.
- Too much intense sunlight is causing some hydrangea leaves to turn yellow and dry.
- due to a late frost, hydrangea leaves are turning brown or black.
- Hydrangea that was recently planted and is dying from transplant shock.
- Root rot caused by soggy, saturated soil or by pots with inadequate drainage
- Because it was put in a too-small pot or container, the hydrangea died.
- A high percentage of manure or excessive fertilizer burns the roots.
To learn how to fix these issues and rejuvenate your hydrangea so that it is strong and blooms the following year, keep reading.
Table of Contents
Hydrangea Drooping (Drought)
- Symptoms. Hydrangea with fading or drooping blooms and foliage. The leaves of hydrangeas may be becoming dark, and there may be foliage growth without many flowers.
- Causes. Lack of water, soil that dries up too soon and loses moisture, tree roots that compete with the hydrangea for water or block rain, too much sun, or too much nitrogen fertilizer are all causes of this problem.
Because their roots are fibrous and somewhat shallow, hydrangeas need continually moist soil to flourish.
The most prevalent cause of stress in hydrangeas—wilting or drooping—is drought or a lack of moisture in the soil.
Typically, this is a result of the summer’s hot and dry weather, although there are other possible causes for the dry soil.
- The hydrangea roots may have trouble absorbing moisture if the soil is sandy or stony and contains very little organic matter (compost or leaf mold).
- The diffused light of a tree canopy is the best environment for hydrangea growth since it mimics their native growing environment. However, if the hydrangea’s roots are surrounded by tree roots that have a high demand for water, this could lead to dry soil (such as beech or pine trees).
- Additionally, if the tree canopy is very deep, raindrops may not reach the hydrangea because of the trees’ extensive leaf coverage, which can intercept and deflect raindrops.
- In addition, hydrangeas do not do well in very exposed regions with strong winds because they are used to shelter from the wind from nearby trees or structures, which dries out their huge leaves.
- The application of fertilizer is another factor that contributes to drooping hydrangeas but is unrelated to soil moisture. If they are planted in carefully prepared soil with plenty of compost, hydrangeas don’t always require additional feeding and frequently don’t even need that. If you fertilize with nitrogen, it can encourage vigorous foliage development and make the stems of your hydrangea soft and sappy, which will make the leaves and blooms droop.
How to Revive a Drooping Hydrangea
- Give the hydrangea’s surrounding soil a hearty watering. Once established in temperate settings, some hydrangeas do not need any further water, but if your hydrangea is competing with other trees or has poor soil conditions, it should be generously watered once per week to combat dry conditions.
- I advise digging the hydrangea out of the ground temporarily and supplementing the surrounding soil with a lot of organic matter if the soil is sandy and the plant is little or just planted. The ideal soil conditions for hydrangeas and a remedy for quickly draining sandy soil are compost and leaf mold, both of which have a good capacity to retain water.
- Apply a one-inch layer of compost, leaf mold, or well-rotted manure as a mulch around your hydrangea. All three substances contribute to soil improvement, nutrient addition, water conservation, and protection from direct sunlight drying the soil.
- If your hydrangea has a lot of foliage but few flowers and a drooping appearance, reduce the amount of fertilizer you use. You may need to wait until the next year for the hydrangea to recover if you give the soil a good soak, which can assist to reduce the strength of liquid fertilizers.
It is crucial to provide these circumstances by properly preparing the soil and watering as needed in order for hydrangeas to thrive in constantly moist soil with plenty of organic matter.
The ideal approach is to test the soil to a finger’s depth to see whether it is moist because the frequency of watering might depend on a variety of factors, including the climate and soil type.
Give the soil a generous soak if it feels a little dry to help the roots take root. The aim is to maintain constant moisture in the soil (but not saturated).
Instead of watering the hydrangea sparingly but frequently, which encourages the roots to grow close to the surface in search of water, you should always give it a deep bath. This makes the hydrangea more susceptible to drought.
The majority of hydrangea species thrive in mild shade, with the ideal ratio of sun and shade frequently being provided by the dappled light of a tree canopy.
Hydrangeas tend to dry out more quickly in full sun, which makes the plant droop. Therefore, choose your planting location wisely, or add some protection with other plants or trees, and water frequently to help the hydrangea recover from its drooping appearance.
(Read why is my hydrangea drooping for more details and best practices.)
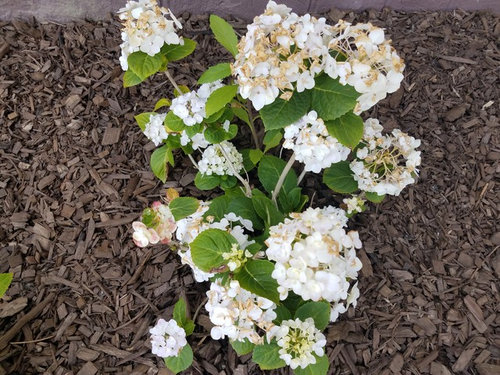
Dying Hydrangea: Too Much Sun
- Symptoms. scorched leaves that, despite watering, may turn yellow, feel dry, and look withering.
- Causes. The majority of hydrangea varieties thrive in morning sun or mild shade provided by a tree canopy. More than six hours of direct sunlight can damage the delicate leaves, especially in drier climes.
Because they are naturally adapted to growing under tree canopies, hydrangeas thrive in gardens that provide some shade and wind shelter for the leaves.
In full sun (more than six hours of direct sunlight), hydrangea leaves can frequently appear burned, turn a little yellow, and lose a lot of water through transpiration.
Additionally, too much direct sunlight tends to dry out the soil, which makes the leaves and flowers of hydrangeas wilt.
How to Tell If your Hydrangea is Sun-burnt
The leaves of hydrangeas should appear the most damaged when exposed to direct sunlight, however those that are somewhat covered by other sections of the plant should retain a more vibrant green color, even though they may also be withering.
While some hydrangeas can grow and bloom in complete darkness, most can thrive with a little amount of sun because it encourages blossoming in the summer.
(Read my post, Why is my hydrangea not flowering? for more information on how to promote hydrangea flowers.)
If your hydrangea is exposed to the sun for the majority of the day, you can either move it to a more shaded area of your yard or provide some shade with some other trees or plants.
The plant as a whole should survive, but severely sunburned leaves are unlikely to recover. The hydrangea should recover if the shoots of the severely damaged leaves are removed to encourage new development.
Why are my hydrangea blossoms turning green? (Read my article.)
Hydrangea Leaves turn Brown or Black due to Frost Damage
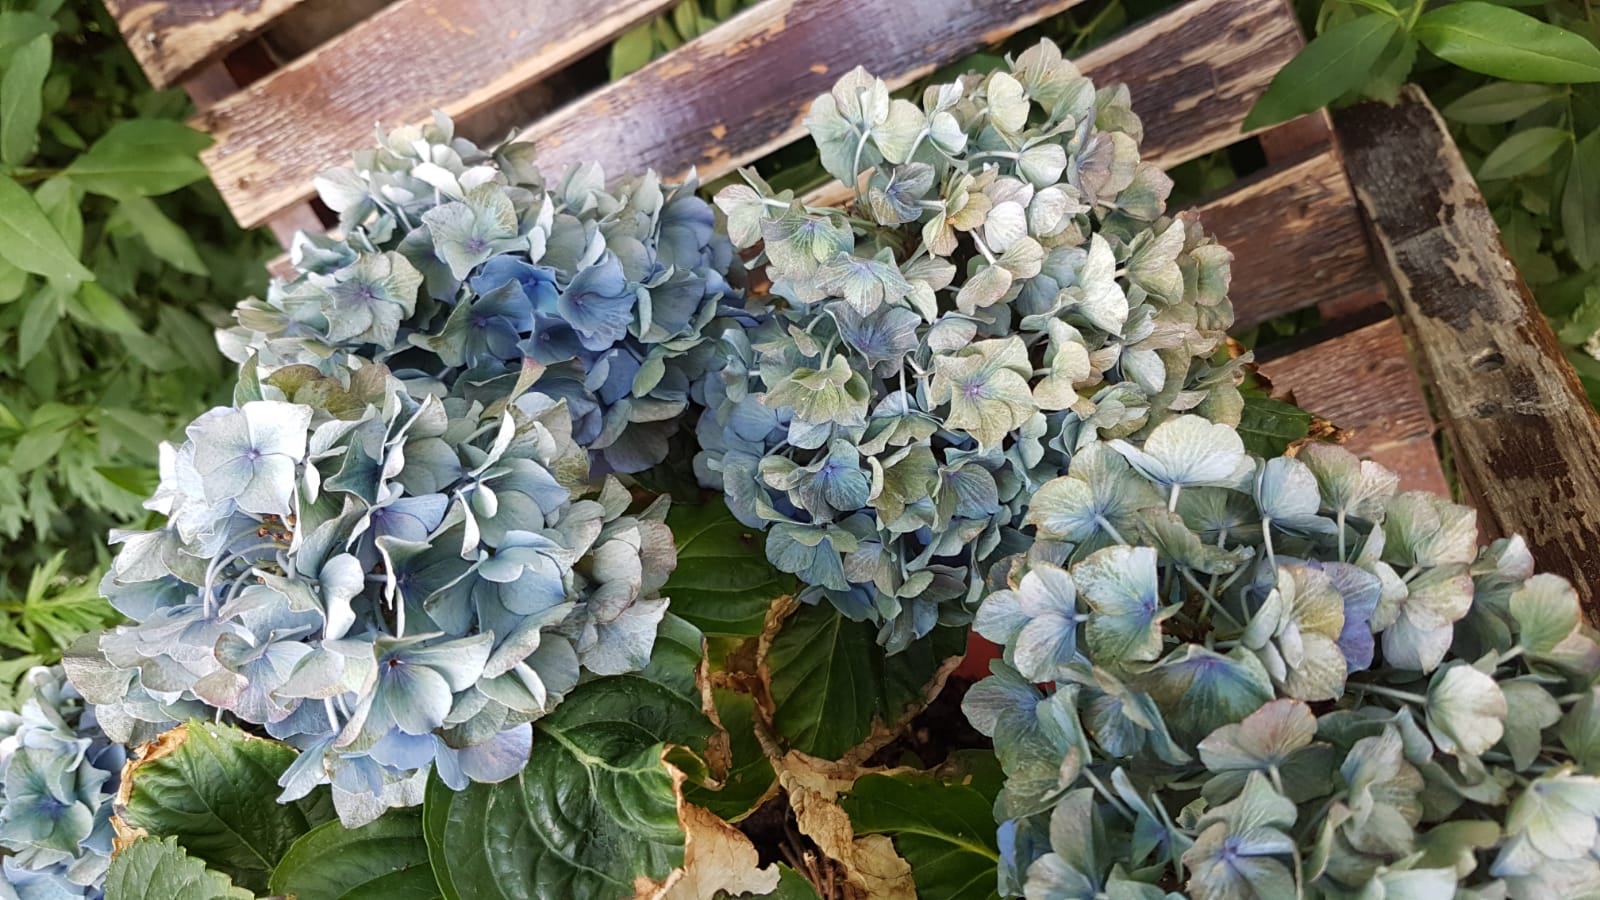
Although there are various reasons why hydrangea leaves can become black or brown, frost damage is to blame if the color has changed over night from a healthy green.
The fresh, fragile growth that emerges in the Spring is most frequently damaged by frost, whereas the larger, more established leaves are frequently undamaged (as they are more hardy and acclimatised to cold weather).
However, if the temperature drops significantly over night, frost damage could happen in the Fall.
Fortunately, hydrangeas are tough plants; even though frost damage may appear severe, with a little tender loving care, the hydrangea can quickly recover. Frost can, however, harm the flower buds, which may prevent the plant from blooming.
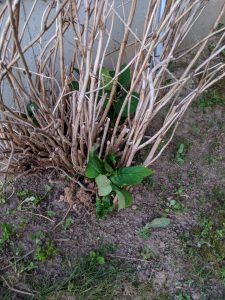
Revive Frost Damaged Hydrangeas
Hydrangeas that have been severely damaged by frost can simply be revived by carefully pruning back any damaged growth with a pair of pruners at the shoots (avoid cutting back into wood). This will encourage fresh, healthy growth over the summer.
After August, stay away from fertilizing hydrangeas as this frequently encourages new, fragile growth when the hydrangeas should be hardening off to get ready for the chilly weather of Winter.
Of fact, frost damage to your hydrangea’s budding flower buds can inhibit flowering.
Since injured flower buds are less likely to bloom afterward, prevention is preferable to treatment.
If you closely monitor your local weather prediction and there is a late spring frost, you should ideally cover the flower buds with horticultural fleece the night before to prevent damage from the frost.
Frost damage is unlikely to harm your hydrangea, so it should recover with time and some gentle pruning, but it might not bloom fully until the following year.
For solutions that actually work, see why is my hydrangea not flowering in my article.
Hydrangea Dying After Planting (Transplant Shock)
- Symptoms. after planting, hydrangeas are fading, drooping, and turning brown
- Causes. transplant shock caused by the difference between the growing conditions in your garden and those at the garden center. Hydrangeas that are planted in the summertime, when temperatures are high and light levels are high, may die.
After they have established themselves, hydrangeas are often hardy, but they are more susceptible to dying during their first season.
This can be a result of them adjusting to their new surroundings.
When the conditions in your garden change significantly from the ones the plant was grown in (at the nursery or while on display in the garden center), transplant shock is more noticeable.
The hydrangea can become quite used to these conditions if it has been carefully cultivated in a nursery greenhouse with the ideal and consistent temperature, fertilizers, water protection from wind and too much sun, etc. This makes the hydrangea less hardy when it is planted outdoors.
Additionally, planting hydrangeas in the height of summer might be troublesome.
The optimum season to plant hydrangeas is in the spring or fall since this provides the hydrangea time to establish its roots and adapt to the soil, allowing it to properly absorb moisture before the high summer heat.
The hydrangea may dry out in the summer due to the increased temperatures, which prevents the roots from absorbing water at the same rate as it is lost through the huge, many leaves, causing the hydrangea to wilt and turn brown.
How to Revive a Newly Planted Dying Hydrangea
- The greatest seasons to plant hydrangeas are in the spring and fall, so aim to timing your plant purchases to coincide with these seasons.
- However, if the newly planted hydrangea is having trouble establishing itself because of the summer’s heat, attempt to shade the plant to protect it as it grows (maybe with an umbrella) and water the plant well as often as necessary to keep the soil constantly moist.
- To assist retain moisture, spread a mulch layer (compost or leaf mold) that is 1 inch deep.
- The greatest thing you can do to revive a hydrangea that is experiencing transplant shock is to offer the finest growing circumstances for hydrangeas and wait for the hydrangea to adapt to its new position.
- When planting hydrangeas, use a lot of high-quality compost to ensure the soil has the right texture, moisture, and nutrients. To protect it from drought stress, provide shade for the hydrangea. Regularly water the hydrangea to keep the soil moist but not soggy (hydrangeas require soil that is moist yet well draining so that the roots do not sit in boggy soil and rot).
Make sure the soil where your hydrangea is planted is appropriate.
If they are planted in soil that is too sandy (drains too rapidly and is deficient in nutrients) or has too much clay, hydrangeas may not survive after being planted (soil drains too slowly and perhaps bakes hard in summer which makes it difficult for the roots to establish).
In gardens with unfavorable soil conditions, it’s crucial to amend as much of an area as is practical (at least twice the size of the root ball) before planting your hydrangea in order to create the ideal soil conditions.
Compost with multiple uses and leaf mold are great soil amendments for hydrangeas. Applying mulch on a regular basis each year also helps to maintain the soil’s favorable conditions for your hydrangea’s growth.
Root Rot (Hydrangea Dying in a Pot or Boggy Soil)
- Symptoms. browning or yellowing leaves that appear withered roots with a silky feel and a dark color.
- Causes. soils that drain slowly, as dense clay or pots with poor drainage.
Hydrangeas cannot withstand soggy soil; they need wet, well-draining soil. Root rot results from a soggy environment in the soil.
Hydrangeas need soil that is both moist and quick to drain, which is a quality of loam soil, compost, and well-rotted organic material from garden waste.
Your hydrangeas may suffer from fungal diseases like root rot if your soil is heavy clay or naturally soggy since it will drain too slowly for them.
This also occurs when hydrangeas are planted in containers without adequate drainage holes in the base or when the drainage holes clog, making it difficult for excess water to escape effectively and leaving the soil too wet and humid for hydrangea growth.
This encourages the growth of fungi that cause illnesses like root rot, which makes hydrangeas droop, develop brown or yellow leaves, and eventually die.
How To Revive a Dying Hydrangea with Root Rot
- If the hydrangea has widespread root rot, it may be necessary to acquire a new one to plant in better conditions with amended soil because it can be very difficult to salvage them if they have been in saturated soil for a long time.
- However, if the hydrangea has only recently been exposed to wet soil or if the soil simply drains too slowly, the plant may only be under water stress and may be salvaged.
- If the ground is soggy, carefully dig up the hydrangea with a fork to prevent further harm to the roots and examine the roots. Use sterile pruners to cut any sick roots back to healthy growth if they are dark in color, soft, and appear infected rather than light in color with a springy, more resilient condition. To prevent the spread of fungus to otherwise healthy roots, wipe the pruner blades with a cloth dipped in disinfectant after each cut.
- The hydrangea should be replanted, either in a container with adequate drainage holes or along a garden border with improved drainage conditions. Replant your hydrangea after adding lots of compost to the soil to improve it.
- Replanting the hydrangea in the same spot can expose it to the fungus that is killing it. Avoid doing this. Once the fungus is eliminated from the soil by applying an organic fungicide, you can eventually plant other plants there without risk (always follow the manufacturers instructions).
The hydrangea has the best chance of recovery if you transfer it to a more advantageous area with improved drainage.
However, growing hydrangeas in pots and containers is the best option if your garden soil is particularly soggy because they have better drainage and you can easily provide the best soil conditions (by using compost) rather than trying to modify your garden borders to suit the hydrangea, which can be challenging.
Hydrangeas Dying Due to Small Pots
When cultivating hydrangeas in containers, pick a container that is at least 16 inches wide (with good drainage).
Drought is brought on by the tendency of hydrangeas growing in small pots to dry up far too rapidly.
Small pots absorb heat from the sun more quickly and have less soil volume, which means they retain less moisture and cause drought.
Large pots work nicely for hydrangea growth. In order for the root system to have adequate room in the soil to obtain all the nutrients and moisture it needs, the pots should be big enough to prevent pot-bound roots.
Transplanting your hydrangea to a pot that is at least 16 inches across will help it recover if it was originally planted in a relatively small container.
The best time to move hydrangea into new pots is in the spring or fall rather than in the summer since transplanting when it’s colder helps to lessen transplant shock and lowers the chance of drought.
To give the hydrangea time to establish without having to deal with the drying effects of the sun, which can cause dryness, keep the soil moist after re-potting and shield the hydrangea from direct sunlight for a few weeks.
Too Much Fertilizer or Manure can Burn Hydrangea Roots
As such, hydrangeas are not heavy feeders and do not require annual feeding in the same manner as roses do, and doing so can actually be detrimental.
Hydrangeas frequently develop and flower to their full potential if they are planted in healthy soil or the soil has been modified with compost prior to planting.
The hydrangea should flourish if a 1-inch-thick layer of mulch is applied around it to assist retain moisture and supply nutrients to the soil (compost and leaf mould are ideal options).
Only in the following circumstances should fertilizer be used:
- – Remove all the leaves! … Due to root rot, which causes the hydrangea to droop, develop brown or yellow leaves, and eventually die, this encourages the growth of fungus-related diseases.
- If your hydrangeas have had widespread root rot for a long time and are in danger of dying, you may need to acquire a new one to plant in amended soil and better conditions. This is because hydrangeas may be very difficult to salvage if they have been in saturated soil for a long time.
The plant might only be water stressed if the hydrangea has only recently been in wet soil or if the soil simply drains too slowly. In these cases, the hydrangea may still be able to be salvaged.
If the ground is soggy, dig the hydrangea carefully out of the ground with a fork to prevent further harm to the roots before looking at the roots. With a clean pair of pruners, cut away any diseased roots that are preventing healthy growth if they are dark in color, soft, and appear infected rather than light in color and in a springy, more resilient condition. To minimize fungus spreading to otherwise healthy roots, wipe the pruner blades with a cloth dipped in disinfectant after each cut.
The hydrangea should be repotted with good drainage holes or moved to a different garden border with better drainage conditions. Replant your hydrangea after a thorough soil amendment with lots of compost.
Replanting the hydrangea in the same spot can introduce the fungus that is killing it because the soil may be home to the fungus. After killing the fungus in the soil using an organic fungicide, you can eventually plant other plants there without risk (always follow the manufacturers instructions).
The hydrangea will have the best chance of recovery if you move it to a more advantageous spot with improved drainage.
Key Takeaways:
- The best option, however, if your garden soil is particularly soggy, is to grow hydrangeas in pots and containers because they have better drainage and you can easily provide the best soil conditions (by using compost), as opposed to trying to modify your garden borders to suit the hydrangea, which can be challenging.
- When growing hydrangeas in containers, go for at least a 16-inch-wide pot (with good drainage).
- Drought is a result of hydrangeas drying up too rapidly when they are grown in small pots.
- Drought is caused by small pots since they heat up more quickly in the sun and have less soil holding capacity.
FAQ
How do you revive a dying hydrangea?
In sizable containers, hydrangeas thrive. For the roots system to have adequate room in the soil to obtain all the nutrients and moisture it needs, the pots should be big enough to prevent pot-bound roots.
Should dead hydrangea blooms be cut off?
In order to assist your hydrangea recover if it is currently housed in a relatively small pot, move it to one that is at least 16 inches across.
How do you bring a dying hydrangea back to life?
If possible, you should move hydrangea into new pots in the spring or fall as opposed to the summer as doing so helps to lessen transplant shock and lowers the chance of drought.
When can I cut the dead blooms off my hydrangea?
After repotting, keep the soil moist and shield the hydrangea from the sun for a few weeks to give it time to establish without having to deal with the drying effects of the sun, which can result in drought.
Why does my hydrangea look like it’s dying?
A hydrangea’s roots can be burned when fertilizer is applied in excess, which will make the plant wilt, droop, and eventually die.