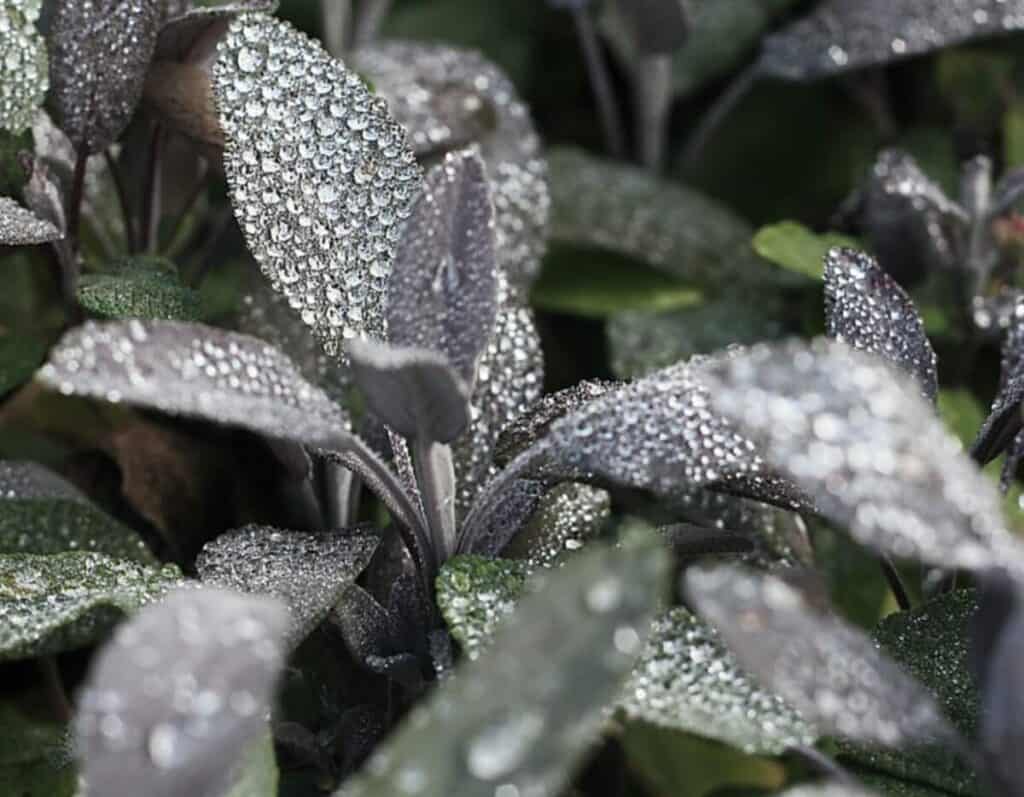
Sage are low-maintenance perennial plants that are adapted to their environment and are native to the Mediterranean region of Europe.
It’s crucial to mimic aspects of the Mediterranean region’s growing conditions for sage plants, with a focus on full sun, sandy soils with good drainage, and occasional watering.
There are a number of ways to resuscitate your sage plant if it appears to be dying, but it’s crucial to identify the specific cause before you do so.
determining the reasons the sage plant needs to be revived:
The most common causes of sage plants that need to be revived are…
- Root rot is caused by too much moisture surrounding the roots as a result of excessive irrigation or poorly draining soils.
- Sage grows slowly, producing few leaves and little flavor or perfume.
- Sage is withering in a pot because the container is too small or the foundation doesn’t have drainage holes.
- Due to not being pruned annually, sage has become woody and is growing poorly.
- Lack of winter recovery in sage plants.
Continue reading to find out how to fix these issues so that your sage plant recovers and the leaves have a strong flavor and perfume.
Table of Contents
Sage Plant with Root Rot
- Symptoms. leaves that appear to be wilting or drooping and are turning yellow, brown, or black. The texture of the roots is slimy and rotting, appearing dark brown.
- Causes. Due to overwatering, poorly draining soils, or pots with inadequate drainage, there is excessively continuous wetness around the sage’s roots.
Mediterranean herb sage thrives on sandy soil and on hillsides in Southern European nations. Sage is therefore adapted to dry, sandy soils with little to no rainfall and intense sunlight.
Although sage wants the soil to dry out between waterings, it is a drought-tolerant plant that can tolerate a variety of climates with certain adaptations.
If the weather has been cloudy and wet, sage only needs to be watered once every two weeks. If the soil is only slightly moist, don’t water the sage.
If sage is grown in a pot and the weather is hot, water it about once a week. Sage that is planted in garden borders frequently doesn’t need any more water in many temperate areas.
Sage is a drought-resistant plant that thrives in neglect, so keep in mind that overwatering might cause more issues (like root rot) than underwatering.
Sage enjoys a soak-and-dry strategy of irrigation, where a large amount of water is used to encourage the establishment of the roots, followed by a drought for one to two weeks.
Revive Sage Plants with Root Rot
- Reduce watering to once weekly in hot weather and once every two weeks in mild weather as a starting point. Sage should only be watered in the spring, summer, and fall, and only when the soil is dry.
- If you can, carefully take the sage plant out of the ground with a garden fork so you can look at the roots. Snip off any mushy, slimy, dark-brown, and infected roots as well as any brown foliage. To stop the spread of fungus, disinfect the pruners after each cut (with a towel dipped in alcohol disinfectant) and burn any plant parts that have been contaminated.
- Sage should be replanted in a container so that you may control the soil profile (as the old soil will be host to the fungal disease that causes root rot). For the ideal soil mix, combine new multipurpose compost with at least 20% horticultural sand or grit. This will ensure that the soil is well-draining and will give the roots time to heal.
Replanting the sage in fresh soil with better drainage and less watering provides the plant the best chance of recovering from root rot and should resurrect over the coming few weeks (depending on the severity of the root rot).
Sage cannot be grown in soil that has a lot of clay or is particularly wet or low-lying because clay traps moisture around the roots, which encourages root rot.
However, since you can readily amend the soil and pots offer much better drainage conditions, which sage plants need, you may still grow sage and other Mediterranean herbs well in pots, containers, or raised beds.
You can effectively replicate the sandy soil conditions of the sage’s native location by enriching the soil before moving the plant to a container. This prevents root rot and maintains the health of the plant.
For the roots to develop properly in the soil without having to compete for space, water, or light, keep in mind to plant sage in full sun and at least 2 feet apart from other plants.
In three to four weeks, the sage should start to show signs of regenerating with the right well-draining soil and watering plan.
Sage is not Growing
Sage is a plant that requires little care and attention and little maintenance.
To maintain the plant growing with aromatic, flavorful leaves, it is crucial to make sure that certain of the growth conditions mimic their natural Mediterranean settings.
Sage thrives in soils with a high sand or stone content that are medium to poor in nutrients.
As a result, sage plants don’t consume a lot of nutrients, and they frequently don’t need any additional fertilizer in the garden soil.
But if sage is grown in pots, it’s possible that the plant has used up all the nutrients and needs some additional nitrogen fertilizer to flourish.
Sage does not grow well if it is shaded for the most of the day because it is suited to the intense sunlight of the Mediterranean.
How to Revive Sage Plants that are not Growing
- For optimum development and more potent flavor and smell from the leaves, place the sage in full light. If the sage is planted along garden borders, think about pruning any overhanging trees or plants that may be blocking the sun from reaching it, or move the sage into a pot and put it in direct sunlight.
- Plant the sage about 2-3 feet away from other plants to give it some room. With more room, the sage’s root system won’t have to fight with those of other plants for light, water, or nutrients in the soil.
- Long-established sage plants in the same container might benefit from fertilizer. In the spring, use a half-strength all-purpose fertilizer to encourage the development of new leaves. The sage will produce a lot of foliage if there is too much fertilizer used, but because there will be less essential oil present, the leaves won’t be as aromatic or flavorful.
Sage is a Mediterranean herb, thus the more you can mimic its natural environment’s growing circumstances, the better it will grow.
Sage will grow more and produce leaves that taste much better in direct sunlight. Sage does not require a lot of food, but it prefers to thrive in open spaces and does not enjoy competition from other plants for water, sunlight, or soil nutrients.
The perfume and flavor of the leaves can frequently be affected by fertilizer application because sage actually prefers soils that are not overly rich in nutrients.
Sage, however, may lack nitrogen or other trace minerals if it has been kept in the same pot, container, or raised bed for an extended period of time.
Half-strength fertilizer should encourage healthy leaf growth, but too much will have the opposite effect and make the leaves yellow and spindly.
(For further information, see why has my sage plant gone yellow in my article.)
Additionally, applying fertilizer to sage in the spring is recommended. If required, you can do so later in the growing season throughout the summer months, but doing so after August will encourage new growth that will be much more susceptible to the cold (sage is not a particularly cold hardy plant generally).
In 2-3 weeks, your sage plant should start to grow and recover if you give it more room, full sun, and perhaps some fertilizer according to your climate.
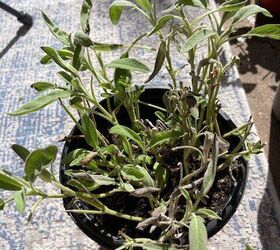
Sage Dying in Pots or Containers
- Symptoms. Poor growth, a droopy or wilted appearance, and yellowing or browning leaves.
- Causes. Because the pot is too small, it dries up too quickly or the roots get confined to the container. To prevent root rot, sage needs containers with drainage holes in the base.
Because of the good drainage, sage plants thrive in pots and containers, but it’s crucial to plant them in the right pots to avoid any problems.
If the container is too tiny, the soil may dry out in the sun before the sage can absorb adequate water, resulting in poor development and wilting of the plant.
(Read my post on why sage plants wilt for more information on wilting sage plants and what to do.)
Sage may have a nitrogen deficit if the pot is too small since there is less room for soil and minerals.
Sometimes attractive pots don’t have drainage holes in the base, which leads to water buildup and root rot.
Sage that is cultivated inside frequently uses drip trays. Additionally, drip trays gather water that keeps the soil consistently damp and increases the risk of root rot, which turns sage brown or yellow.
How to Revive Dying Sage Plants in Pots
- To allow excess water to drain and the soil to dry, place your sage plant in a pot or container with drainage holes in the base rather than a drip tray.
- As the sage plant grows, repot it in a larger container. To accommodate the root system and make sure there are enough nutrients in the soil, sage should be grown at maturity in a container that is between 12 and 16 inches across. The soil does not dry out before the sage’s roots can absorb water since larger pots do not dry out as soon.
- A broad all-purpose fertilizer applied at half intensity can aid in promoting growth in nutrient-starved potted sage.
Sage should be moved to a pot with drainage holes if it is wilting and the leaves are turning yellow. The soil should also be amended with sand or grit to enhance drainage.
The sage will have a chance to recuperate as a result of the roots being given time to dry out. The sage most certainly has root rot if there is a lot of brown leaves, so you should take the same actions as with root rot.
(Read my post to find out more about how to treat browning sage plants.)
It is always a good idea to re-pot your sage every year or so (in the Spring) to a larger pot in order to avoid the soil from drying out too quickly and more dirt insulates the roots from cold weather. Smaller pots restrict the growth of your sage with less access to water and nutrients.
Sage should have a good chance of reviving and growing well if it is planted in a container that is 12 to 16 inches across, has drainage holes in the base, and has soil that has been supplemented with sand or grit.
Try using a half-strength all-purpose fertilizer in the spring to encourage growth if it is extremely slow.
Sage, on the other hand, is evolved to growing in soils that are low to medium in nutrients, therefore if it is put in a container that is the right size, it frequently doesn’t need any fertilizer.
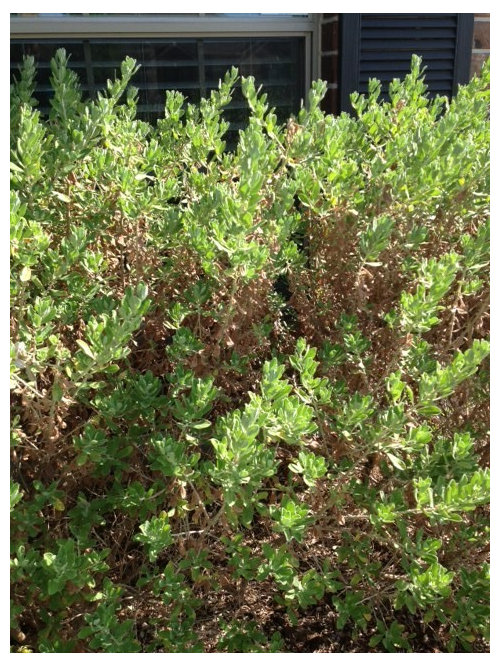
Sage that has gone Woody and Leggy
- Symptoms. Sage with stems that are woody, not generating much new growth, and appear untidy.
- Causes. a sage plant that hasn’t had annual pruning.
In order to promote development and slow down the woody growth from the base, which does not produce as much leaf or new stem, sage, lavender, and rosemary are all woody sub shrubs native to the Mediterranean region. Each year, either at the beginning of spring or in the fall, they all need to be pruned.
Sage does get increasingly woody with age, but yearly pruning prevents this from happening and keeps the plant appearing neat.
This will contribute to the sage’s increased lifetime (note sage often only grows flavourful leaves for 3 years). When an annual pruning is neglected, a plant becomes woody and needs to be revived.
How to Revive Woody Sage Plants
If woody sage has not been pruned for a long time, it may be difficult to revive; but, if it has only been neglected for a short while, it may be feasible to revive with some careful trimming.
The key is to avoid cutting back into the woody growth at the base of the plant because this woody area, which is older than a year, can not sustain much new growth and a sharp cut can kill the sage.
Sage should be pruned slightly above any newly emerging leaves in the early spring (this will encourage more stems to support more leaves) and into a mound shape to encourage even new growth and prevent the plant from becoming lanky.
For an excellent visual tutorial on how to trim woody sage, check out this YouTube video:
You can either pick up the sage and replace it if it is too leggy and producing few new leaves, or you can take cuttings from the healthy section of the plant and propagate them.
Sage may be propagated from cuttings quite easily and without any special tools or hormone root powder.
The spring and summer are the greatest seasons for cuttings since you may save more of your original sage plants and replace them with fresh, smaller plants at a far lower cost.
The following video demonstrates how to grow sage for cuttings:
How to Revive Sage after Winter
The trick in colder climates is to put sage in pots and containers and bring the plant indoors. Sage that has been left outside in Winter with freezing temperatures is vulnerable to the cold.
If you do not have space to store your sage plant during the Winter, you can treat the perennial sage as if it were an annual and acquire a new plant or grow the sage from cuttings. Place the sage in a sunny window sill when the temperatures in your home or possibly a garage to protect the plant.
Key Takeaways:
- Sage usually needs to be revived because of root rot, woody growth, the improper kind of pot or container, or because it isn’t growing because of nutrient deficiency or winter damage.
- Sage with root rot has to be cut back on watering, had any unhealthy roots or leaves removed, and then be planted in a pot with fresh soil that drains properly.
- Sage that is not developing properly frequently needs to be repotted in a larger container, and springtime application of a mild fertilizer can encourage some development. Make sure the bases of the pots have drainage holes.
- Sage that has become woody has to be pruned well to encourage new growth and slow the growth of wood that cannot sustain leaves. To maintain the plant neat, prune each branch back to the nearest new growth in the early spring.
- Sage is vulnerable to frost damage in the winter, so if you live in a cold region, plant it in pots and bring it indoors. If you don’t, it will be difficult to resuscitate it after the winter.
FAQ
Why are my sage leaves curling?
In humid temperatures, Powdery Mildew develops on the tops of the leaves. The surface of the leaves seems to be white or grayish, and they may curl.
What causes a leaf to curl?
Many issues, such as insect damage, disease, abiotic conditions, or even herbicides, can result in curled leaves. When they suck plant juices from fresh or young leaves that are still growing, a variety of insect pests cause the leaves to curl. These include aphids, thrips, and whiteflies. Whiteflies have two different ways in which they might harm a plant. The first is regarded as “direct” harm. Whiteflies can cause major damage to plants by sucking their juices, which makes their leaves turn yellow, shrivel, and die off too soon. Controlling Whiteflies in Your Garden – UC ANRhttps://ucanr.edu/Controlling Whiteflies in Your GardenControlling Whiteflies in Your GardenControlling Whiteflies in Your Garden
How can you tell if sage is overwatered?
If your sage is overwatered, it will become drooping and its leaves will begin to turn yellow. Root rot, which occurs when the roots start to decompose and die, may potentially affect the plant. Your sage plant may have white powder on its leaves, which is an indication of mildew.
What does it mean if my plant leaves are curling?
Too much direct sun or heat can cause heat stress in plants, which is why they try to retain moisture by curling their leaves, according to Richard Cheshire, the plant doctor at Patch.
Can you over water sage?
Sage favors dry soil, thus it is easily overwatered. Common overwatering symptoms include wilting and drooping. If the plant is consistently overwatered, sage leaves may turn yellow, brown, or even black. Watch out for root rot, which is typically caused by too much water.