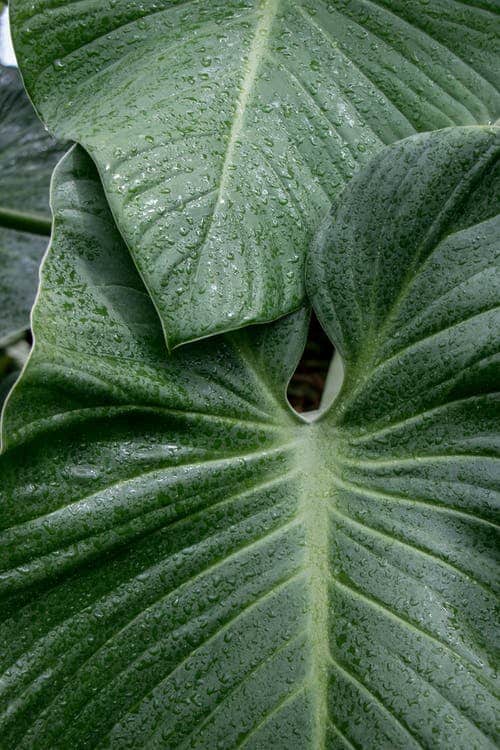
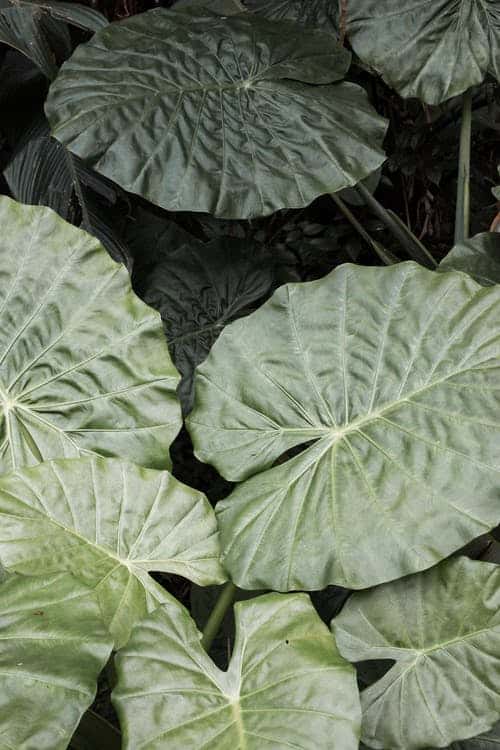
Elephant ears are some of the most majestic plants you can find in your garden. They have long, fleshy stems with large leaves that grow out from each side and their signature bright green color. It’s no wonder why they’re so popular among people who want bigger houses or just want something different for their yard.
But what happens when this beautiful flower suddenly starts turning yellow, brown, or even black? Well, if it is an elephant ear plant, there may be hope! Although the process might take time, it’s not impossible for them to come back from the dead once revived. The following guide will help explain how to revive an almost-dead elephant ear plant.
Table of Contents
Why Is My Elephant Ear Plant Dying?
There could be several reasons as to why your elephant ear plant has started dying. First off, if its roots were damaged during planting, water was scarce, or insects attacked it, then these things could be the reason behind the plant’s death. If any of those factors happened, the best thing you should do is get rid of all traces of insect infestation by using sprays and other products containing pesticides.
If you suspect damage caused due to improper watering, use a rain gauge to check whether adequate rainfall occurred. Watering too much at one go might burn the stem and cause root rot. You need to give enough attention to the plant’s needs.
One way to avoid these issues is to make sure that the soil around the base is moist but does not become saturated. Too much moisture can also kill the plant. Soil that becomes wet over a period of days can lead to rotting of the topsoil which causes bacterial infection. This leads to fungal infections like damp mold and mildew along with diseases such as crown gall and scald. To prevent this, ensure that the surrounding environment remains dry while maintaining uniform humidity levels. Proper irrigation is essential for healthy growth.
Once the main problems have been addressed, keep a close eye on the plant. In case the problem reoccurs, repeat steps 1 through 4 until the issue gets resolved.
How to revive Elephant Ear plants?
When dealing with elephant ears, there are two ways to bring life into the plant – transplant it elsewhere or cut it down completely. However, sometimes it is better to focus on bringing new shoots instead of trying to replant the entire plant.
A good way to rejuvenate your plant would be to remove the lower parts of the leaf cluster near the ground level. These portions tend to die first because they don’t receive sunlight. Doing this will allow more light reach the upper part where new bud formation occurs.
You can also try giving the plant some extra care after cutting it down entirely. After removing the old stem, apply fertilizer and mulch onto the area. Add compost mixed with manure. Put rocks on the surface too. Be careful not to harm the new buds since they’ll soon appear. Once the new shoots start growing, you can add sand to create a barrier between the newly grown shoot and the sunrays.
After a few weeks, the new shoots will begin showing signs of blossoming. When they finally bloom, put them in pots filled with potting mix. For the next month or two, mist the flowers every day. During winter, you won’t require direct sunlight although the temperature mustn’t drop below 15 degrees Celsius (59 Fahrenheit).
This type of plant doesn’t produce fruits, but you can still enjoy watching it blossom throughout springtime. As summer approaches, you can expect the flowers to last longer than usual. But remember to maintain proper hygiene and wear gloves whenever handling them. Use scissors to trim away fallen petals and foliage. Avoid touching the blooms directly as doing so can result in disease transmission. Wipe the dirt off the freshly cut flowers regularly. Keep the flowers away from strong winds.
The tips mentioned above are only a couple of easy methods used to revitalize an elephant ear plant. There are many others including pruning, fertilizing, and adding nutrients to the soil. Try experimenting with some of the techniques and see which works best for your particular elephant ear variety.
Although it takes some patience and a lot of work, bringing an elephant ear plant back from the brink of death isn’t very difficult either. Now that you know about how to revive a nearly-dying elephant ear plant, you can now sit back and wait patiently for its return.
When choosing where to place your new Elephants, bear in mind that they tend to spread rather than to stay compactly bunched together. So unless you plan to keep them within close reach of one another, give them room to breathe! Also, remember that because they enjoy plenty of sunshine, they’ll happily sprout along shady parts of your property, provided those shady spots aren’t too damp.
Feeding Your Elephant Ears – It isn’t necessary to feed them once they’ve started growing. However, if you live in a colder climate then it might help to sprinkle a little fertilizer over the surface of the root ball every now and then to encourage fresh shoots to appear. There may also be occasions when you find yourself short of water and it’s here that adding a little bit of compost can really pay dividends. Just take note of what kind of mulch/soil condition you already have and check whether the addition of humus would improve matters by itself. If you notice your elephants starting to look pale or having yellow patches then it could simply indicate either drought stress or fungal infection. Either way, you’ll probably know better than I whether you need to dig down deeper or spray insecticides!
Planting your Elephant Ears
Like all plants, they love moisture and warmth but unlike many others they don’t appreciate frost. Ideally therefore, stick to late autumn or early spring as soon as possible after rain. Use a trowel instead of your fingers to turn the spongy dirt back under the soil level and remove weeds by hand. Dig holes big enough to accommodate the entire rootball plus 10cm beyond both sides.
Make certain that the hole is deep enough to allow good drainage and firmness below ground level. To aid the process, gently shake excess dirt aside before filling in the bottom. Then fill surrounding area with soil to prevent weed seeds from germinating nearby. After sowing, cover lightly with soil again and repeat above steps for subsequent sowings. Water sparingly during first few weeks of growth and avoid covering the top of the roots as they begin to poke through.
Once established leave about 1 cm between individual plants allowing air flow beneath the soil level. Keep moist but never wet. Remove weeds once they start poking up. Feed monthly with organic fertiliser. Avoid overwatering and let dry completely between showers. During hot summers, reduce watering frequency to weekly. A final tip is to cut away any dead tips that form on old woodier specimens. This encourages fresh new growth and prevents rotting.
Maintenance Tips: Prune annually right after harvest to remove spent blossoms. Cut back weak wood to a strong center node. Do this carefully using sharp secateurs or loppers or electric pruners. Cutting off side branches makes new buds stronger, reduces risk of disease transmission and promotes fuller leaf production.
Clip any suckers produced between existing plants. As the name suggests, Elephant Ears produce clusters of small offsets called “bulbs” often referred to as “elephant ears”. Each bulb contains two corms connected by fibrous tissue known as “sheath”. Suckers grow from the sheaths and if left unchecked can quickly overwhelm the parent plant. Eventually, the mother plant will die. Therefore, removing these offsets can prolong the lifespan of your Elephant Ears. Simply snip the bulblets off when they break free of the sheath. You can usually tell when this happens since the new shoot will immediately show signs of rapid growth. Remember to save and replant bulbs where they will flourish and multiply further.
How to Care For Elephant Ears Plants: (step by step guide)
1) Choose a location that gets adequate sunlight throughout the day.
2) Plant approximately 2 inches apart. Space larger plants closer together.
3) Allow 3 feet space between tall plants and 6 feet between smaller ones.
4) Place taller plants 15 to 20 feet higher than shorter ones.
5) Add a mulching layer for winter protection. Try pine bark or straw in the summer months.
6) Mix slow-release nitrogenous manure and vermiculite according to package directions. Apply in fall season.
7) Mulch heavily shaded beds with landscape fabric secured by stakes to ensure proper circulation of air. New grasses, moss and evergreen shrubs work particularly well.
8) Mow grass frequently to promote healthy rooting. Shave lawn blades lengthwise.
9) Trim annuals in mid-summer.
10) Fertilize moderately with granular products containing moderate amounts of phosphorus.
11) Weeds must be controlled. Scrape and hoe actively growing weeds. Pull and snap perennial weeds. Spray nematicides selectively. Follow manufacturer guidelines. Note: Some nematodes attack specific types of turfgrasses while others affect almost every type. Determine which group(s) are present in your region and choose appropriate treatment accordingly.
12) Control slugs and snails with copper strips or diatomaceous earth applied directly onto the soil surface. Copper treatments should be reapplied periodically due to leaching effects of rainfall.
13) Protect newly emerged seedlings from birds and squirrels by tying string around their necks. Take precautions against aphids by spraying affected plants with soap solutions made from dishwashing liquid combined with rubbing alcohol. Sprays should be repeated several times per week.
14) Prevent blights by applying fungicide when temperatures rise above 50 degrees.
15) Be careful not to damage tiny developing fruits.
16) Harvest mature inflorescences as needed.