The yellowing of orchid leaves is an indication of stress from overwatering or drought and is caused by withering roots that can no longer transfer water or nutrients around the orchid. In addition to sunburn and temperatures lower than 55°F, orchids can also turn yellow due to these factors.
Most frequent causes of yellowing orchid leaves include:
- Too much water might lead to root rot (Orchids should only be watered once every 7-14 days).
- Root rot develops when the potting medium holds too much moisture (orchids should be planted in a potting solution made of pine bark chips). The orchid cannot tolerate moss or regular potting soil because it holds too much moisture around the roots.
- Planting orchids in containers without foundation drainage holes (orchids do not tolerate water pooling around the roots due to decorative outer pots without drainage, or saucers and trays that retain water as water should be able to freely escape from the base of the pot).
- You don’t water your orchids enough or you water them too little (a lack of water kills the orchids roots so they can no longer supply the leaves with water an nutrients which causes the leaves to turn yellow).
- Sunburn causes the leaves to turn yellow (orchids should be located in bright, indirect as their leaves are sensitive to sun damage).
- Ordinary indoor plant fertilizer burns the roots of orchids and causes the leaves to become yellow (orchids require an orchid specific fertilizer, as regular house plant fertilizer is too strong).
- The leaves of orchids can turn yellow at temperatures lower than 55°F (orchids are very sensitive to cold temperatures).
- When conditions change, orchids that have been replanted may experience transplant shock, which can result in yellowing of the leaves as a symptom of stress.
Orchids typically become yellow when their roots are withering or when their habitat is not conducive to the conditions to which they are acclimated. Read on to find out how to save your orchid and why its leaves are turning yellow.
Table of Contents
Orchid Leaves Turning Yellow due to Root Rot (Overwatering)
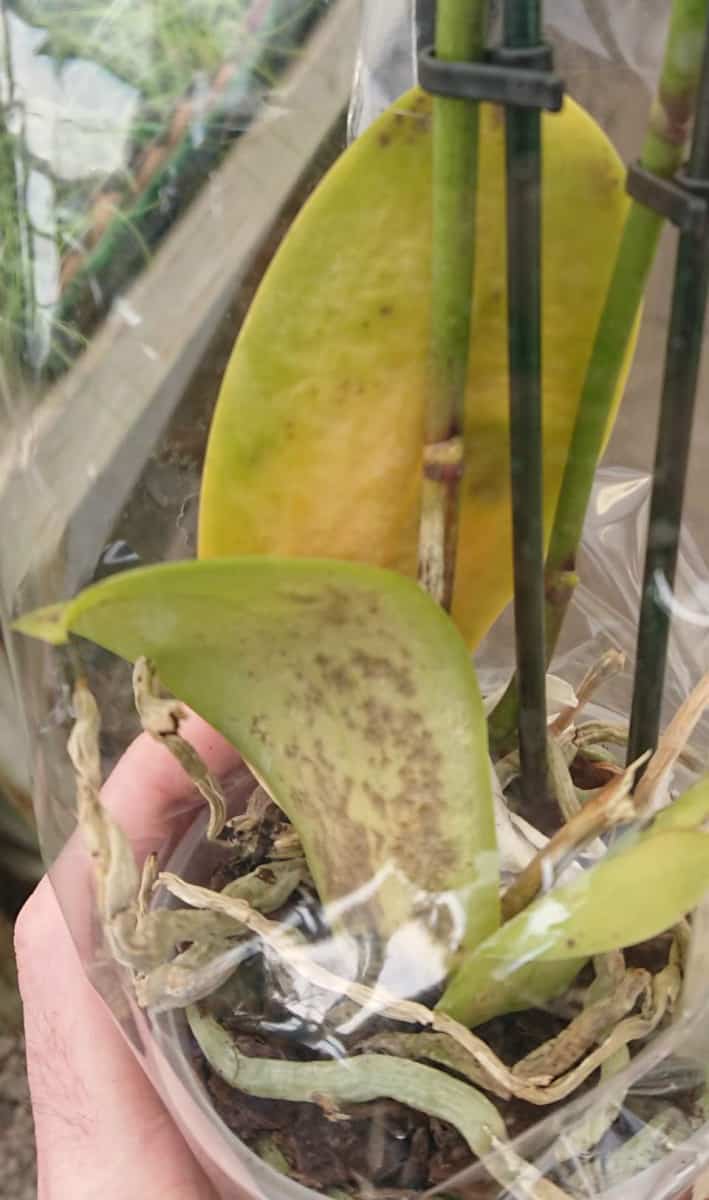
Overwatering or poorly draining soils produce root rot, which causes the yellowing of orchid leaves. Orchid roots that are deprived of oxygen in saturated soil eventually perish. The yellowing of the leaves is caused by the dying orchid’s roots, which are unable to carry nutrients and water around the plant.
Because they are epipthyes, orchids grow in loose aggregate or on trees rather than in soil.
Because of this, orchids need an aerated potting media that allows enough oxygen to flow around the roots for optimum respiration and root activity.
The fact that orchids do not tolerate their roots being in damp soil, which causes the roots to rot, further indicates that orchids are designed to grow in environments with great drainage.
Overwatering orchids creates the circumstances for root rot by reducing the oxygen available to the roots, which is necessary for root respiration. The orchid’s leaves become yellow as a sign of stress once the roots have withered away because they can no longer move the water and nutrients around the plant that keep it healthy.
The same effect as overwatering is also caused by potting mediums that store too much moisture, such as moss and regular potting soil, which restricts the oxygen available to the roots, causing them to shrivel and die back and turning the leaves yellow.
The potting material may just be too compact and lack the porous properties that the orchid needs for the roots to operate effectively rather than necessarily retaining an excessive amount of moisture.
Pine bark is the perfect potting material for orchids because it most nearly mimics the growing conditions of the orchid’s preferred environment.
Even if you are overwatering the orchid, the big size of the pine bark chippings provides plenty of oxygen to circulate around the roots for effective root respiration and encourages excellent drainage, greatly reducing the risk of root rot.
The roots can then take in the water vapor when the moisture in the pine bark chips evaporates, simulating how orchids take in water in their natural habitat.
Because of their much smaller particle sizes, moss and potting soil frequently deprive the roots of oxygen and contain too much moisture around the roots for orchids to endure, resulting in yellow leaves.
How to Save Orchids with Yellow Leaves due to Overwatering
- Reduce irrigation to only once per week. Overwatering is the reason why your orchid leaves are becoming yellow if you water it multiple times a week. Only water orchids when the top inch of the potting soil feels dry. In order to satisfy the orchids’ water needs without running the risk of root rot, it is typical to water them once every week in the spring and summer and once every two weeks in the fall and winter. However, depending on a number of variables, watering frequency can change. (Read my post on how to water orchids to understand the appropriate frequency of watering for your orchid based on the season and various situations.)
- Examine the roots after removing the orchid from the potting soil. Healthy orchid roots have a green (or light gray) appearance and feel swollen, indicating that they are storing water, operating well, and are well-hydrated. The roots of the orchid are rotting and withering back if they are papery, brown, yellow, or thin and shriveled with a terrible odor. It is crucial to clip back the dying or dead roots to conserve the orchid since they cannot regenerate and can spread rot.
- Remove any dying or ill roots with a scissors. In order to stop the possible spread of rot, the roots that are yellow, brown with a mushy texture, or fully shriveled are unable to transfer water or nutrients (resulting in yellow leaves) around the plant.
- Using a clean pair of pruners or scissors, trim the dying roots back to the plant’s base or to healthy tissue. Although removing roots may seem severe, orchids are stronger than their reputation would indicate. They can regrow new, healthy roots that can actually absorb the moisture and nutrients that the orchid needs to survive.
- Pine bark can be used in place of the potting soil (or a prepared orchid potting mix). The orchid must be replanted in fresh potting soil since the old potting soil may include fungi that can cause root rot. Even though your orchid is planted in pine bark, it is advisable to repot it every two years or so with new potting soil because pine bark decomposes throughout that time (like any organic matter), which might reduce the aeration and drainage from the roots’ surrounding areas.
The orchid has a chance to produce new, healthy roots and eventually recover if you have removed all of the sickly and dead roots and repotted it in new potting soil.
The yellow leaves may not recover on their own and may eventually turn brown and fall off, but if the roots are strong, the orchid can begin to grow new, healthy green leaves as long as it is properly cared for.
For a useful visual explanation on how to save orchids with root rot, view this informative YouTube video:
Should I Cut Yellow Orchid Leaves Off?
In general, avoid removing the yellow orchid leaves by pulling or cutting them. Once they have died back from a lack of nourishment, the yellowing leaves fall off naturally. You run the danger of needlessly harming the orchid if you try to force the leaves off.
Normal orchid leaf changes include yellowing, shriveling, browning, and self-falling. The spot where the leaf was attached is sealed over when it falls off naturally, as opposed to when a leaf is forcibly removed from a plant, when it leaves an open wound.
It is usually preferable to allow the leaves to fall off naturally rather than forcing or cutting off the fading leaves, as doing so might lead to wounds that become infected by fungi that can further harm your orchid.
After flowering, yellow orchid stems can be safely pruned back to the plant’s base. Read my article about the yellowing orchid stem.
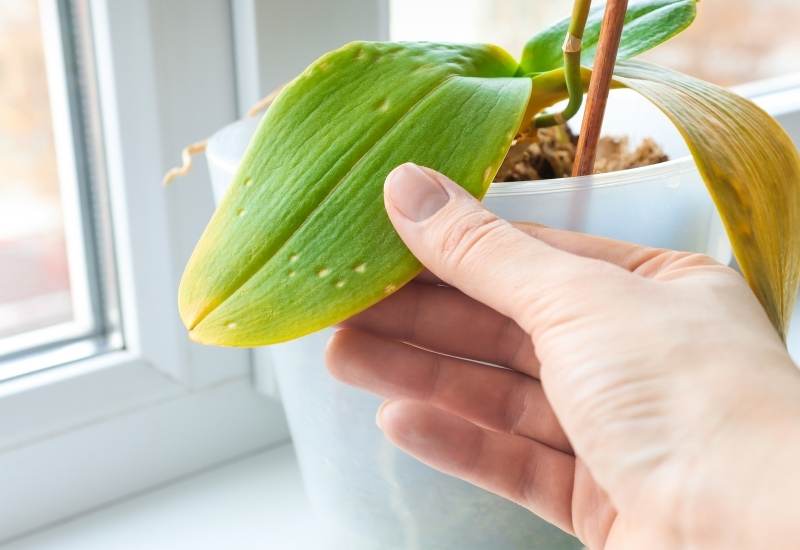
Orchid Leaves Yellow and Wrinkled (Drought Stress)
If they are not watered frequently enough, are watered too lightly, or because of low humidity, orchid leaves become yellow. Orchid roots that are overwatered become white, shrivel, and die. The orchid’s leaves become yellow because the shrunken, withering roots are unable to provide water and nutrients to the plant.
Even though orchids normally need less watering than other house plants, the potting soil still has to be thoroughly saturated after each watering to allow the orchid roots to take on the moisture and collect water vapor from the air around them.
To prevent drought stress and yellow leaves, the potting material should be evenly moist after watering. If the orchid is watered too lightly, just the top inch or two will be moist.
As a general rule, orchids need to be watered once every seven days in the spring and summer and once every fourteen days in the fall and winter.
After watering, healthy orchid roots should be green. After a week, they should develop a light grey hue and feel puffed up.
Lack of water causes the roots of underwatered orchids to shrivel up, become thin and papery, and eventually die.
When the roots stop functioning effectively due to a lack of water, they are unable to transmit nutrients and water to the leaves, which causes them to yellow and shrivel.
Low humidity can contribute to leaf yellowing because orchids are accustomed to growing in situations with a typical humidity of 40 – 60 percent.
The humidity in our homes is typically much lower than this, which can dehydrate the leaves and exacerbate the drought stress that causes yellowing of the leaves.
How To Save Orchids With Yellow Leaves Due to Underwatering
- Make sure the root ball is completely buried and submerge the orchid pot in a basin of water for approximately 10 minutes. This permits water to effectively permeate the potting material so the roots can reach the moisture they require. After ten minutes, take the orchid out of the bowl and let the extra water drip out of the pot’s bottom.
- Before watering the orchids again, wait until the top inch of the potting medium feels dry (typically watering once every 7 days). Always give orchids a good soak when watering. To make sure the potting media is evenly moist, do this either below the faucet (tap) or once more in a water-filled basin.
- Orchids need typically be watered every seven days in the spring and summer and every fourteen days in the fall and winter. Before watering again, make sure the top inch of the potting soil has dried out. This minimizes the risk of overwatering, which can lead to root rot, and satisfies the orchids’ watering needs to maintain the leaves healthy green rather than yellow.
- Every two days, mist the roots, stems, and leaves of the orchids. When an orchid is under drought stress, it is a good idea to constantly spritz the area around it with a spray bottle to raise the humidity. Regular misting mimics the humid conditions found in an orchid’s native environment by creating a humid microclimate.
- Make sure your orchid is in an environment that is the proper temperature and free from heat or air currents. To grow and flower, orchids need a temperature range of 55–75°F during the day and at night. The rate of evaporation from the potting medium can increase if the temperature is too high or fluctuates noticeably as a result of indoor heating. This can rob moisture from the leaves faster than it can be drawn up by the roots, causing drought stress that kills the roots and turns the leaves yellow.
- Draughts and air conditioner currents can reduce humidity to the point that they stress orchids and exacerbate the conditions that cause their leaves to become yellow. Make sure the location of your orchid is free from drafts in the house.
- While an orchid is suffering from drought stress, keep it out of any direct sunlight. Orchids prefer bright, indirect light that protects the delicate leaves from burning while still providing the plant with enough light for it to produce energy and flower. The need for water increases as solar radiation increases. Yellow leaves and a withering orchid are signs that the roots are suffering from dryness because they are unable to supply moisture at the same pace as a healthy plant.
The most crucial step in protecting an orchid with yellow leaves from drought stress is to change the way you water your plants. Wait until the top inch of the potting medium feels dry before watering; do not allow the medium dry out completely.
For the majority of homes, this process takes about a week in the summer and 14 days in the winter, but I strongly advise reading my article on watering orchids so you can know how to water your orchid properly for your climate and conditions. There are many factors that can affect how frequently you should water your orchids in order to keep them healthy.
The other best practices of orchid care, like as maintaining it in the ideal temperature range and preventing it from being exposed to heat sources and drafts, should assist to save your orchid.
The orchid can recover as long as some of its roots are still functional. The yellow leaves may fall off and die back, but once the environment is more hospitable, new leaves can emerge.
Since orchid roots can perform photosynthesis to help the plant obtain energy in the absence of healthy leaves, clear plastic containers are a good approach to promote greater growth and hasten the orchid’s recovery.
(Read my post on picking the best pots for orchid growth.)
The orchid can recover after new roots begin to form and new, green leaves begin to replace the yellow, fading leaves.
(For a detailed explanation, see my article on how to save a dying orchid.)
Orchid Leaves Turning Yellow Because of Too Much Sun
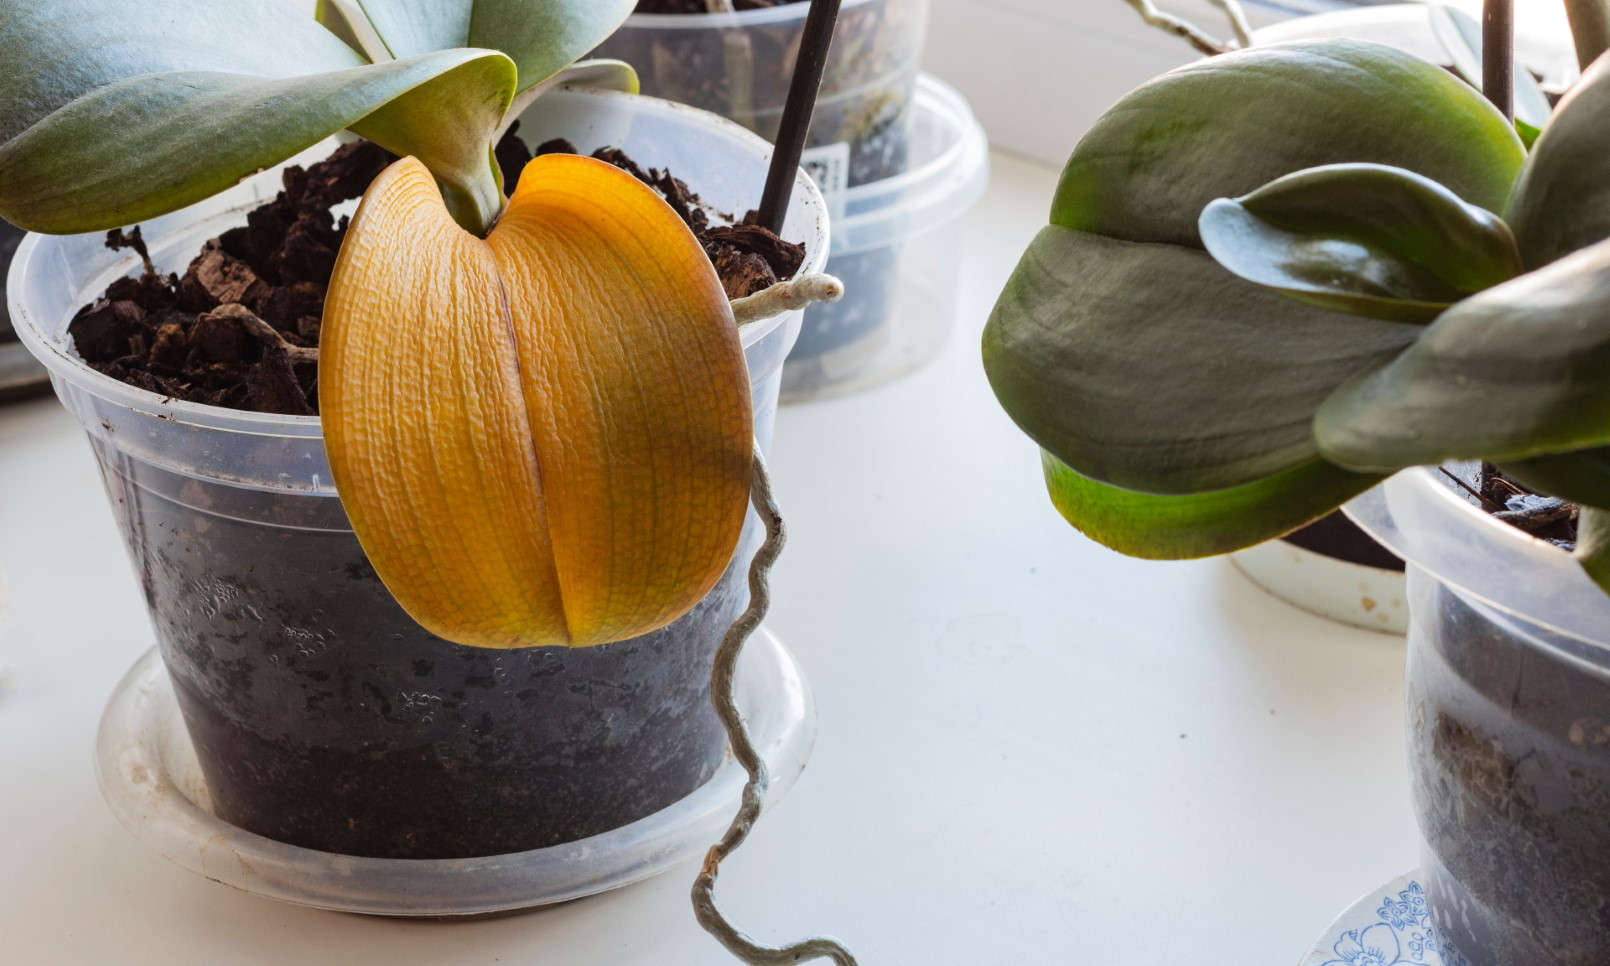
Orchids should, in theory, be grown in bright, indirect light as this gives the plant enough energy for flowering without exposing it to the risk of sunburn. However, as orchids are accustomed to growing in forests, they do not withstand harsh sunlight. They can, however, flourish in slightly filtered light.
The hue of sunburned orchid leaves is yellow and slightly brown, and it is more noticeable on the leaves that are facing the sun.
The individual sun-burned leaves do not recover from their charred appearance or turn green, even though the orchid can occasionally survive.
The plant as a whole suffers from the burnt leaves’ inability to function, which also causes the leaves to frequently become brown, die back, and fall off the orchid.
As the bright sun dries out the leaves, potting soil, and roots much more quickly, causing drooping leaves, stems, and destruction to any blossoms, a sunburned plant is typically also experiencing drought stress.
Once you’ve relocated the orchid to a location with better conditions, it can recover and sprout new leaves.
How to Save Yellow Orchid Leaves from Sun Burn
- Place your orchid in a location with strong, indirect light at all times to prevent heat stress and harm to its delicate leaves. Because orchids are evolved to the shade of the forest canopy, it’s crucial to mimic these conditions when cultivating orchids inside by avoiding direct sunlight.
- Instead of removing the damaged leaves, wait for them to fall off. When they are prepared, the orchid’s sun-burned golden leaves usually turn brown, wilt back, and drop off. Self-removal could cause the orchid harm.
- For best results, repot your orchid in a clear plastic container. Because their roots can photosynthesize to give the plant with energy, orchids are remarkable in this regard (usually the function of the leaves). Although the primary purpose of roots is not photosynthesizing, since the leaves are injured and unable to do so, this is a crucial technique for the orchid to recuperate. Clear plastic containers let light reach the roots, giving the orchid the energy it needs to function and produce new leaves.
With proper care, the orchid can eventually sprout new, typically smaller leaves and bounce back.
Depending on the extent of the damage, an orchid’s sun-burned golden leaves may take some time to heal. In most cases, an orchid recovers significantly more quickly if part of its leaves are damaged while some are shielded by shadow.
The orchid can still show indications of recovery during the coming weeks, but on a longer time scale and at a slower rate of recovery if all the leaves are injured and fall off.
Too Much Fertilizer Turns Orchid Leaves Yellow
If you use regular houseplant fertilizer, orchid roots, which are more sensitive than those of most houseplants, can burn and wither.
The roots of orchids are burned by too much fertilizer, which causes them to wither away. The burned roots can no longer move water and nutrients throughout the plant, which causes the orchids’ stressed-out leaves to become yellow.
Although orchids don’t require a lot of food, specifically developed fertilizer for them stimulates healthy growth and promotes flowering.
Specific orchid fertilizer reduces the risk of the roots burning or an excess of salts building up in the soil that could obstruct the roots’ ability to absorb water, both of which can cause the leaves of orchids to turn yellow. It also contains all the nutrients, at the right concentration, for orchids to thrive.
The leaves of the orchid may get floppy and fail to produce flowers if the fertilizer you are using is too strong or you are using it too frequently.
How to Save Orchid With Yellow Leaves due to Excess Fertilizer
- Reduce the amount of fertilizer you use and wash the orchid roots and potting soil for about 10 minutes under a mild water stream from the tap. This aids in dissolving extra salts that may build up from fertilizer application on a regular basis. The roots can better absorb water when it is needed when there is less salt in the potting medium. This is a temporary fix, and for the orchid to really recover, the potting medium should ideally be changed.
- Allow the top inch of the potting media to dry out over the course of a week by letting the water drain through the drainage holes.
- It is a good idea to check your orchid’s roots after a week. If you have a clear plastic container, this is simple, but if not, remove the orchid from the potting soil and look at the roots. The roots of the orchid should be green or light gray and puffed out, which shows that they are in good health.
- Any roots that have gone brown, black, or thin and white are in the process of withering away. Since these roots are no longer able to move water or nutrients around the orchid, cut them back to the base.
- Repot your orchid into a fresh potting medium made of pine bark chips or a special potting mix for orchids (avoid moss as it retains too much moisture and promotes the conditions for root rot). The orchid has a higher chance of recovering in the new potting mix because it doesn’t have any excess fertilizer’s detrimental effects, such as salt buildup.
- Yellow leaves are probably going to die and fall off on their own. Avoid attempting to remove the leaves while they are still in place because doing so could harm the orchid.
With proper care, the plant should recover over the coming weeks, with new leaves starting to appear in the Spring and Summer. However, this depends on how severely the roots were harmed.
It is crucial to stress that, while feeding orchids, you should use specialized orchid fertilizer (available from garden centers and on Amazon) rather than standard houseplant fertilizer.
The roots of orchids are far too delicate for regular fertilizer because they are epiphytes, which means they prefer to grow on trees and frequently get their nutrition from the rain or water vapor around them in their natural environment.
Always adhere to the manufacturer’s directions while using special orchid fertilizer because they support healthy orchid development and encourage flowering.
Cold Temperatures Cause Orchid Leaves to Turn Yellow
Because they are extremely sensitive to cold, orchids need a temperature range of 55–75°F during the day and at night.
Although they can withstand the occasional decrease in temperature below 55°F, any extended duration below 55°F can stress orchids and cause their leaves to turn yellow.
When an orchid is in a draft or close to a cold window, especially if the leaves come into contact with the cold window pane, this frequently occurs.
Root rot is encouraged by cold temperatures because the orchid potting mix stays moist around the roots for a longer period of time.
Orchids are tougher than is typically thought, but because of their sensitivity to the cold, it is sadly more harder to save an orchid that has been damaged by the cold.
The likelihood of recovery depends on the severity of the orchid’s cold damage; if there is significant damage, the orchid is likely to die back and not recover, whereas there is a chance of recovery if there is only minor damage to one or two leaves that may have come into contact with a cold window.
The orchid will have the best chance of healing if it is kept in a room with consistent temperatures that remain between 55°F and 75°F and adheres to all recommended care standards, such as watering it once every 7–14 days and placing it in a location with bright, indirect light.
When the orchid is under stress, avoid fertilizing because this can encourage foliage growth at a time when the plant is already stressed.
Your orchid should recover if fresh green growth starts to appear in the spring and summer.
Orchid Leaves Yellow After Repotting
Repotting or transplanting your orchid may cause it to experience an environment change that is at conflict with the circumstances it prefers.
You must change the stressful environmental factors if you want to save it.
The roots of orchids need a potting media with a specific surface area to allow oxygen to circulate around the roots for root respiration, hence repotted orchids should be done once every two to three years. Pine bark chippings are the greatest potting soil for orchids because of their pore-filled design, which encourages good drainage and protects the roots.
If you’ve replanted your orchid in moss or potting soil, these materials retain too much moisture around the roots and rob them of oxygen, which leads to yellowing of the leaves and eventual death of the orchid.
Therefore you should always pot orchids in pine bark potting mediums (or specific orchid bark based potting mixes) for a healthy orchid rather then moss or conventional potting soil.
It is also vital to plant orchids in the suitable pot. Always plant orchids in pots with drainage holes in the bottom of the pot.
Orchids cannot accept their roots being in soggy soil, so if they are placed in a beautiful outer pot or on saucers or trays to prevent water from leaking, it is crucial to empty the saucer of extra water on a regular basis.
The steps for rescuing an orchid due to overwatering are at the top of the article. If your orchids have been submerged in water because of saucers, trays, or ornate outer pots, follow them.
The orchid should be able to adjust after repotting in the following weeks as long as it is kept in bright, indirect light at a temperature of between 55°F and 75°F, watered with a good soak once every 7-14 days, kept out of draughts, and misted every few days to create a humid micro-climate.
(Check out my article on how to save a dying orchid.)
Key Takeaways:
- Most frequently, overwatering and slowly draining soils are to blame for root rot, which results in yellow orchid leaves. The orchid’s leaves will become yellow if the plant’s roots are unable to transfer water and nutrients because of root rot.
- If there is too much moisture surrounding the roots, it can cause root rot in orchids and cause yellowing of the leaves. The roots might die back and become oxygen-deprived in moss and regular potting soil, which can result in yellow leaves.
- The best potting soil for orchids is pine bark because it has good drainage and allows oxygen to flow around the roots to prevent root rot and yellow leaves.
- When orchids are grown in pots without drainage holes or saucers beneath the container, water pools around the roots, leading to root rot, which causes the orchids’ leaves to turn yellow.
- Yellow orchid leaves may be an indication that the roots have drowned and shriveled. If the orchid is not given enough water, its roots may wither and become unable to absorb nutrients or water, which will cause the leaves to become yellow as a symptom of stress.
- Sunburn causes the leaves of orchids to turn yellow. Orchid leaves are extremely sensitive to direct sunlight since they have evolved to grow in the shade in their natural habitat. When orchid leaves are in direct sunlight, they burn and turn yellow.
- Too much fertilizer can cause orchid leaves to turn yellow. Orchids don’t consume a lot, therefore if fertilizer is applied too frequently or in excess amounts, the roots may burn and cease to function, which will cause the orchid leaves to become yellow and die.
- If orchids are exposed to temperatures below 55°F, they can turn yellow. Because of their extreme sensitivity to cold, orchids. The orchid leaves will turn yellow under stress if they come into contact with a cold window pane or are in a cold environment.
- Due to transplant shock, orchid leaves turn yellow after repotting. Yellowing leaves are an indication of stress and can be brought on by changes in potting material, temperature, ventilation, or humidity. If you repot orchids in moss or potting soil as opposed to pine bark, the leaves may become yellow and indicate root rot.
FAQ
What does it mean when orchid leaves start to yellow?
Overwatering is the most frequent cause of yellowing orchid leaves, followed by too much light. Yellowed leaves can be treated by changing the plant’s temperature, light exposure, and watering schedule.
Why do orchid leaves start turning yellow?
Food Insufficiencies Orchids struggle to produce chlorophyll, which causes the leaves to turn yellow, if they do not receive enough nitrogen and magnesium. Your plant is likely deficient in nitrogen, magnesium, or both if the tips and sides of your orchids’ leaves start to turn yellow.
Do yellow leaves on an orchid mean too much water?
Yellowing Leaves May Occur Due to Overwatering Your orchid’s leaves could turn yellow if you overwater it, which can cause root rot. The good news is that Just Add Ice orchids only require three ice cubes once each week, so overwatering is never a concern.
How do I fix yellow leaves on my orchid?
Yellowing is unavoidable as the plant ages and each leaf reaches the end of its existence. All yellowing orchid leaves finally go off. Allowing a leaf to get yellow and dry out has no negative effects on the plant. To keep the orchid appearing new, you can always clip them off if they begin to change color.
Should I cut off the yellow leaves on my orchid?
In general, avoid removing the yellow orchid leaves by pulling or cutting them. Once they have died back from a lack of nourishment, the yellowing leaves fall off naturally. You run the danger of needlessly harming the orchid if you try to force the leaves off.