
When a hydrangea dies, it is typically because the soil is too dry or it is exposed to too much sunshine, which causes the leaves to wilt and turn brown. Frost damage can easily affect springtime new development, turning the leaves and flower buds dark and mushy and giving them a dead aspect.
Here is a reference table listing the symptoms and most frequent causes of hydrangea death:
| Conditions: | Why the hydrangea died: | Symptoms: |
| Drought Pressure | For hydrangeas, continually wet soil is essential. The hydrangea can become drought stressed due to a variety of factors, including excessive wind, a lack of water, soil that drains too quickly, too much sun, tree roots that compete with the hydrangea for moisture, high temperatures, and a dense tree canopy that prevents rainfall from reaching the soil. | Wilting, potentially turning brown and curling leaves and flowers |
| A lot of sun: | Woodland plants like hydrangeas tend to flourish in dappled light. Sensitive leaves can be burned by too much sun, turning them brown. The hydrangea may wilt due to drought stress brought on by direct sunlight. | The leaves of hydrangeas are burned brown, curled, and dead. |
| Overuse of Fertilizer: | High concentrations of fertilizers can damage the roots of hydrangeas. A surplus of nitrogen can burn the roots and turn the edges of the leaves brown. The leaves becoming brown may be due to runoff from lawn fertilizer. | leaves that look to be fading and have a dying aspect, potentially with fewer flowers. |
| Hydrangea in a pot: | The soil can become saturated and the roots can die from root rot in pots that are too small and dry out too rapidly or don’t have sufficient drainage at the base. | wilting flowers and leaves because of the undersized pots If the hydrangea has root rot, look for drooping, yellowing, or brown leaves. |
| Frost Injury: | Natural hydrangea growth occurs in protected woodlands; they are not particularly tolerant of cold winds or late frosts. A late spring frost frequently harms newly sprouting leaves and flower buds and might stop flowers from blooming. | The leaves and flower buds may become mushy, brown, or even black. Damaged flower buds frequently fail to bloom. |
| After plating or transplanting, a hydrangea starts to die: | The hydrangea may wilt and die if the soil is too dry because it often takes some time for the roots to develop after planting and before they can draw up water effectively. A fading hydrangea may also be the result of transplant shock brought on by a change in the environment. | wilting flowers and leaves. The leaves may turn yellow, brown, or black and look to be dying. |
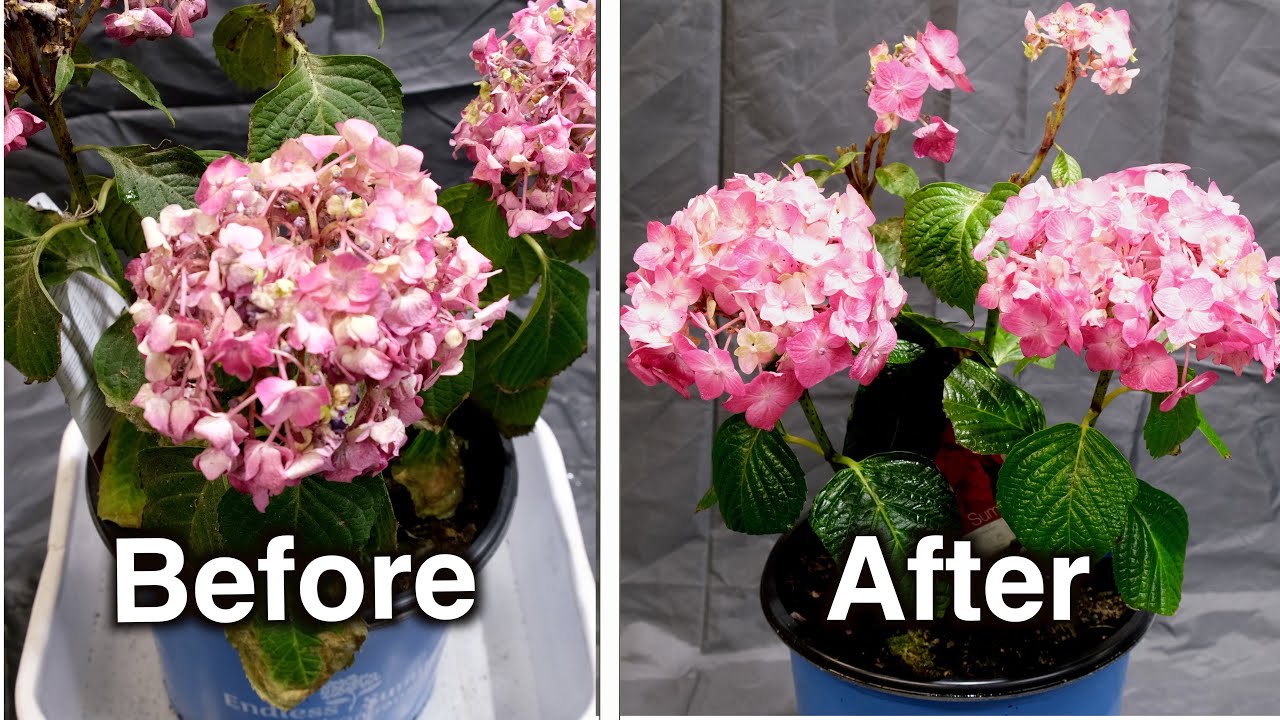
Continue reading to learn why your hydrangea is dying and how to apply the remedies to save it.
Table of Contents
1. Hydrangea Wilting and Dying (Drought Stress)
Hydrangeas wilt and die when there is insufficient moisture around the roots owing to lack of watering or rainfall, rapid soil drainage, excessive sun exposure, or strong winds that dry out the leaves. Inadequate fertilizer can cause hydrangea flowers to droop.
The hydrangea’s leaves may also begin to curl and turn brown if they are extremely drought-stressed.
The native habitat of hydrangeas is woodlands, where they thrive in rich, moisture-retentive soils made of leaf mold, where they are shielded from direct sunlight and strong winds and receive regular rainfall.
Because of their shallow, fibrous roots and sensitivity to drought, hydrangeas need a steady supply of moisture at the roots to keep their leaves from looking wilted.
When it’s hot outside and there isn’t much rain, hydrangeas can wilt. They can also wilt after being planted because it takes time for the roots to become established enough to be able to absorb moisture.
Here are the primary environmental stresses that lead to hydrangeas wilting and dying:
- If hydrangeas are planted in sandy or stony soil that dries out too rapidly, plants will wilt. Hydrangeas require soil that is enriched with organic matter which helps to retain moisture around the roots.
- inadequate rainfall or underwatering. If they are in the correct soil and out of the sun, established, mature hydrangeas frequently do not require watering, but smaller hydrangeas or transplanted hydrangeas should be thoroughly watered as often as necessary to maintain the soil’s moisture.
- Always water with a good soak to assist the roots to grow to a greater depth into the soil to find moisture as they establish. Watering too lightly causes the roots to grow shallow, which increases the hydrangeas’ susceptibility to drought.
- Since hydrangeas are not well adapted to growing in full sun, they often lose more moisture from their leaves than they can pull up via their roots, which leads to the leaves wilting, turning scorch-brown, and eventually dying.
- A lot of wind dries up the leaves before the roots can absorb moisture. Hydrangeas require a lot of moisture, and excessive wind can quickly dry the leaves, leading them to droop and the hydrangea to succumb to dryness.
- Excessive nitrogen fertilizer makes hydrangeas droop because it encourages the growth of weaker, sappy foliage that sags under its own weight and gives the impression that the hydrangea is wilting.
- However, a dense tree canopy with an abundance of leaves can intercept rainfall and prevent rain from reaching the soil, generating dryer conditions. Hydrangeas are woodland plants that grow well beneath trees.
The Approach…
Increase the amount of soil moisture available at the roots as the top priority if you want to salvage a wilting and dying hydrangea by making some changes to its environment to aid in its recovery.
- As often as necessary, water the hydrangea to keep the soil regularly and uniformly moist. If your hydrangea is wilting, water it with a hose to keep the soil moist so the roots can absorb moisture. How frequently you need to water hydrangeas depends on your climate, soil type, weather, and how mature they are.
- Always use a deep, liberal soak as opposed to a quick rinse. The hydrangea’s tolerance to drought is increased by watering since it thoroughly soaks the soil surrounding the roots, promotes them to grow deeper into the soil, and helps them establish properly.
- Mulch should be applied to the soil’s surface surrounding the hydrangea in a 2 inch depth. Mulch options that can retain moisture in the soil after irrigation include leaf mold, compost, and well-rotted manure. In order to keep the roots cool and lower soil evaporation, mulch on top of the soil also blocks the sun from directly beaming onto the soil around the hydrangea.
- You can move the hydrangea to a sheltered area if it is in a sunny or windy location, or you can build a shelter with other trees and shrubs. I advise moving the hydrangea to a more protected area if it is still young and not well-established in the soil (under the protection of a tree if possible).
- Alternatively, you can put a tall plant, like bamboo or a tree, next to your hydrangea to help screen it from direct sunlight and drying winds (hydrangea grow best in morning sun followed by afternoon shade or dappled light throughout the day).
- Reduce the amount of fertilizer you use while the hydrangea is wilting. Hydrangeas can droop from too much nitrogen, which can come from fertilizer sprayed to the plant or runoff from fertilizer used on the grass. Use a good set of pruners to remove any drooping growth brought on by fertilizer use since it is more prone to pests, disease, and frost damage.
I advise digging up the hydrangea temporarily and amending the soil with lots of organic matter (compost, leaf mold, or well-rotted manure) to mimic the hydrangea’s moist soil conditions in its native habitat if your garden soil is particularly sandy or stony and the plant is wilting and dying right after planting.
The greatest long-term solution to the issue of wilting hydrangeas may be to prepare the soil so that it retains more moisture.
The best time to replant a hydrangea is in the spring or fall when the weather is milder. Replanting during the hotter summer months might make the problem worse, and since the plant is dormant in the winter, doing so runs the danger of root rot.
Over the following weeks, the hydrangea can recover from its withering appearance with sufficient hydration around the roots and shelter from wind or sun.
2. Hydrangea Leaves Turning Brown and Dying
The most frequent cause of hydrangea leaves turning brown is excessive sunlight, which scorches the leaves and gives them a dead aspect. The leaves of hydrangeas turn brown and fall back when exposed to full sun since they are accustomed to growing in partial shade or dappled light.
The woodland plants known as hydrangeas have evolved to live under the canopy in dappled light all day long.
When hydrangeas are in full sun, the leaves can get brown, crispy, and curled in at the edges, especially when high temperatures and a lack of moisture are present.
The leaves lose a lot of water and wither away when exposed to too much sun, which also turns the delicate leaves brown and increases transpiration.
While excessive sunlight is typically the main cause of browning hydrangea leaves, other factors such as drought stress brought on by a lack of water, high temperatures, poor soil that does not keep enough moisture, and wind can also play a significant role.
When exposed to excessive sunlight, hydrangeas either succumb to drought stress or all of their leaves scorch, turn brown, and wither, which prevents the hydrangea from photosynthesizing and causes it to perish.
The Approach…
Although hydrangeas can grow in complete darkness, most species need some sun to encourage flowering.
To prevent the hydrangea leaves from turning brown from too much sun and to ensure there is enough sun for blossoming, the trick is to strike the balance between sun and shade.
Locating your hydrangea in an area with morning sun, followed by midday shade, and then a region of dappled light under a tree canopy, is the greatest approach to attain the ideal balance.
Hydrangeas can benefit from sun (to stimulate flowering) in the mornings without running the danger of suffering from drought stress or scorching and becoming brown because early sun is less powerful than midday or afternoon sun and the temperature is typically much lower.
I advise growing a tree, shrub, or perhaps bamboo next to your hydrangea to help reduce wind and give the dappled light conditions that hydrangeas love if it is not practicable to move your hydrangea to a different location of the garden.
It is best practice to clip back brown and crispy hydrangea leaves with a good set of pruners because they won’t recover (this can be done at any time of year).
I advise you to follow the same recommendations as stated above regarding wilted hydrangeas and give the soil a particularly liberal soak to help the roots draw up moisture because brown leaves are frequently linked to drought stress.
To assist retain moisture, add a layer of mulch to the soil near the hydrangea’s base.
The hydrangea should begin to show signs of recovery in the coming weeks with adequate hydration around the roots and protection from wind or sun.
3. Hydrangea Leaves Turning Brown at the Edges and Dying (Too Much Fertilizer)
The leaves of the hydrangea tend to droop and there are frequently fewer flowers if it has received a little too much fertilizer (nitrogen promotes foliage growth at the expense of flowers, read my article, why is my hydrangea not flowering).
However, if fertilizer is applied too frequently or in excess amounts, the leaf edges may become dark and appear to be dying.
Because lawn fertilizer contains a lot of nitrogen, it can burn plants when it dries up after a lot of rain and runs off the lawn into garden borders (and towards the roots of your hydrangeas).
Not only can fertilizer applied in excessive concentrations cause hydrangea leaves to turn brown and die back, but fertilizer applied too frequently can also result in a buildup of salts in the soil at the roots of the hydrangeas.
The hydrangea’s ability to absorb moisture (via osmosis) is hampered by the salts that have built up in the soil as a result of excessive fertilizer use, which can result in drought-like signs including drooping leaves and brown withering foliage.
The Approach…
- Reduce the amount of fertilizer you use.
- Use a good set of pruners to remove any seriously damaged leaves.
- Give the soil around the hydrangea a good soak to help dissolve excess salts that are left behind by fertilizer to help restore balance to the soil and help the hydrangea recover. Excess fertilizer generates a build-up of salts in the soil that can affect the roots’ ability to draw up moisture.
- Maintaining the moist soil conditions that hydrangeas enjoy and reducing the concentration of fertilizer and salts near the roots can help the plant recover. Continue to water the hydrangea liberally every few days (preferably with a hose).
Rich soil is ideal for hydrangea growth, and mature plants in good soil frequently do not require fertilizer since they have established root systems that can absorb nutrients.
However, fertilizer applied in the spring might promote the development and flowering of less mature hydrangeas.
Because excess fertilizer can harm hydrangea roots and leaves, it’s critical to apply the proper fertilizer to avoid any more issues.
In order to avoid problems associated with using too much fertilizer and to support a healthy plant with good flowers, I advise using a well-balanced all-purpose granular fertilizer like miracle-gro on hydrangeas. This fertilizer contains all the nutrients a hydrangea requires at the proper concentration.
As they disintegrate, the granules release the nutrients gradually as opposed to instantly as with a liquid fertilizer.
Hydrangeas are hardy plants, so as long as you water them frequently to remove salts from the soil, they should bounce back the next season.
(Read my article to find out why my hydrangea is wilting.)
4. Potted Hydrangea Dying
When hydrangeas in pots die, it’s frequently because the container is too small or lacks drainage holes in the base. Small pots soon dry out, which results in the hydrangea leaves that are drooping and dying. The hydrangea dies from root rot in pots without drainage because water collects around the roots.
The profuse leaves of hydrangeas, which have a sizeable and fibrous root structure, demand a lot of moisture.
Smaller pots can store less soil, which means they can hold less moisture.
The thirsty hydrangea roots quickly absorb and expel all the fluids present in the pot, giving the plant a withering appearance and causing its leaves to curl inward and become brown under drought stress.
If the pot’s base doesn’t have drainage holes, water will collect around the hydrangea’s roots.
This either results in root rot or deprives the roots of oxygen, preventing root respiration and obstructing the roots’ capacity to absorb moisture.
As a result, the leaves begin to yellow and droop, giving them a withering aspect.
The Approach…
- Hydrangeas should be grown in pots that are at least 16 inches across and the same proportionate depth. With a pot this size, there is more soil for the hydrangea roots to draw up moisture and less chance of drought-related wilting. It is worth repotting your hydrangea to a larger pot every two years, but examine the roots every year to be sure. Hydrangeas can grow very large, and the roots can become pot-bound.
- If necessary, water your hydrangea to keep the soil continuously moist. Since hydrangeas require continually moist soil to flourish, it is crucial to water them more frequently because the earth in pots dries up more quickly than garden soil.
- Your climate will determine the exact frequency of watering, however during the height of summer, potted hydrangeas may need daily watering. However, in the summer, a large pot with rich potting soil that is kept out of the midday and afternoon sun typically only has to be watered twice a week.
- Always water with a generous soak rather then a light irrigation. Give the hydrangeas a good soak, allowing any extra water to drip out the bottom of the pot. This encourages the roots to establish themselves and makes sure the water has reached the roots where it is needed. Only the top inch of the soil is moist when you water too lightly, and the water does not go to the roots. In order to access the scarce moisture, too little watering also encourages the roots to move closer to the soil’s surface, making the hydrangea more susceptible to drought.
- Hydrangeas should always be planted in containers with drainage holes on the bottom to let excess water drain and avoid root rot. In order to prevent excess water from pooling around the roots and causing root rot, hydrangeas need soil that can hold moisture while still being permeable and well-draining.
- In order to prevent compacted dirt from clogging any drainage pores, which can hinder drainage and result in root rot, it is ideal to apply a layer of gravel at the bottom of the pot or container before planting hydrangeas there.
If the potted hydrangea is suffering from drought stress as a result of a small container that dries out too soon, it should begin to recover after being repotted and given plenty of water.
It is considerably more challenging to save a hydrangea if the roots have rotted as a result of soggy soil, which is why using pots with drainage holes at the base is crucial.
5. Hydrangea Turning Black or Brown and Dying (Frost Damage)
If harmed by frost, hydrangea leaves and flower buds may turn black or brown. Hydrangeas’ springtime development is extremely vulnerable to cold temperatures and is susceptible to dieback after a late frost. The outermost leaves may wither in cold temperatures, preventing blossoming.
If given enough time to harden off before winter, hydrangeas are cold-tolerant plants and can withstand subfreezing temperatures.
However, a late frost and wind can cause harm to the new leaves and budding flower buds in the spring, turning the growth dark and mushy.
Due to their adaptation to growing in protected regions, hydrangeas are typically damaged by a mix of cold wind and frost.
The Approach…
Since hydrangeas are indigenous woodland plants, they thrive in shaded areas with stable microclimates that protect them from chilly winds and hard winter conditions.
So, rather than planting your hydrangeas in a more exposed location of the garden, it is a good idea to move them closer to a tree, fence, or other protected place.
When planted next to hydrangeas, other tall plants like bamboo, bushes, or trees can act as a wind buffer, which is surprisingly efficient at preventing frost damage.
With a good pair of pruners and any frost-damaged growth, you can trim it back to healthy growth to aid in the plant’s recovery.
Frost normally damages the hydrangea’s outermost growth, while the inner growth, which is better protected by the hydrangea’s mature leaves and stems, typically survives.
Frost damage can reduce the amount of blooms on show because flower buds are typically the most vulnerable to frost in the winter, but hydrangeas have multiple buds on each stem, giving them more opportunity to produce blossoms.
This indicates that the hydrangea can produce flowers, however they often appear a little later than usual and may not be as numerous.
The following year, the hydrangea ought to recover well.
(Read my article to learn why my hydrangea isn’t in bloom.)
6. Hydrangea Dying After Planting or Transplanting
After planting, hydrangeas experience transplant shock as a result of the abrupt change in growing environment.
The hydrangea is specifically adapted to its current growth conditions and can suffer from a contrast in light, airflow, soil moisture and structure, watering, temperature, and shelter if you purchased it from a nursery or are transplanting it from one section of your garden to another.
When planted outdoors, hydrangeas that have been raised in precisely regulated greenhouse settings are much less hardy.
Wilting of the hydrangea’s leaves and blooms is the most typical sign.
The hardship of being transferred is frequently made worse by planting hydrangeas in hot, dry weather throughout the summer, when their huge leaves wilt and turn brown because their roots cannot absorb moisture quickly enough to maintain them.
The optimum times to plant or transplant hydrangeas are in the spring and fall when the weather is cooler and the plants’ roots have time to grow and adapt to the soil before summer’s high temperatures.
Although fully established, hydrangeas are highly hardy, they are particularly susceptible to wilting and dying after planting.
The Approach…
- In order to avoid any additional stress from hotter summer temperatures, it is ideal to purchase and plant (or transplant) your hydrangeas in the spring or fall.
- It is recommended to amend the planting area with compost, leaf mold, or well-rotted manure to a depth and width of 18 inches before planting hydrangeas. In order to ensure that the hydrangea roots are in their ideal soil conditions, with optimal levels of moisture and strong well-draining soil structure, as well as to aid the roots suck up moisture after planting, organic matter such as compost holds a lot of moisture.
- When necessary, water newly planted hydrangeas to maintain a wet but not soggy soil. If you planted in the summer, you might need to give the hydrangea a good soak every day after planting.
- To assist retain moisture, spread a 2 inch layer of compost mulch around the base of the hydrangea.
- If the hydrangea is in the sun, give it some temporary shade (maybe with a sun umbrella), as additional sunlight speeds up the rate at which the plants lose water through their leaves, leading to wilting and eventual death.
The preparation of the soil is essential for growing hydrangeas and avoiding their death.
Woodland plants like hydrangeas do best on soils that are consistently damp, rich in organic matter, and mulched with fallen leaves every fall.
Leaf litter and organic materials have a porous, well-draining structure that allows extra water to flow away from the roots of hydrangeas while yet retaining moisture.
This makes it easier to achieve the ideal moisture balance so that the roots can absorb the moisture that the hydrangea needs and so that the roots are not sitting in saturated soil, which can lead to root rot.
Before planting, amending the soil with organic matter successfully simulates hydrangeas’ natural environment and makes sure that your hydrangea can draw water more efficiently.
The leaves of your hydrangea should brighten up during the next few days if you keep it sheltered and well hydrated (with a thick layer of mulch).
While hydrangeas need moist soil to survive, it’s crucial to prevent the soil from becoming too wet and waterlogged, which can lead to root rot.
Key Takeaways:
- The cause of a dying hydrangea is typically too dry soil around the roots as a result of underwatering, sandy soil that does not keep enough moisture, excessive sun exposure, or wind, which dries up the leaves and gives them a death aspect.
- A withering hydrangea is a result of drought stress brought on by drowning, dry sandy soil, excessive wind, hot temperatures, or too much sunlight. For hydrangeas to avoid their leaves drooping and dying, the soil around the roots must be continually moist.
- When hydrangea leaves get too much sun or fertilizer, they turn brown. Because the leaves of hydrangeas are susceptible to too much sun, they scorch easily and turn brown. This is why they love dappled light. Too much fertilizer burns the roots and gives plants a dying appearance by turning the edges of the leaves brown.
- Hydrangeas sometimes wilt and die after planting because their roots have not yet developed enough to draw up enough water to support the thick, many, and big hydrangea leaves. To keep the hydrangea from withering after planting, make sure the soil is continually wet and protected from the sun and wind.