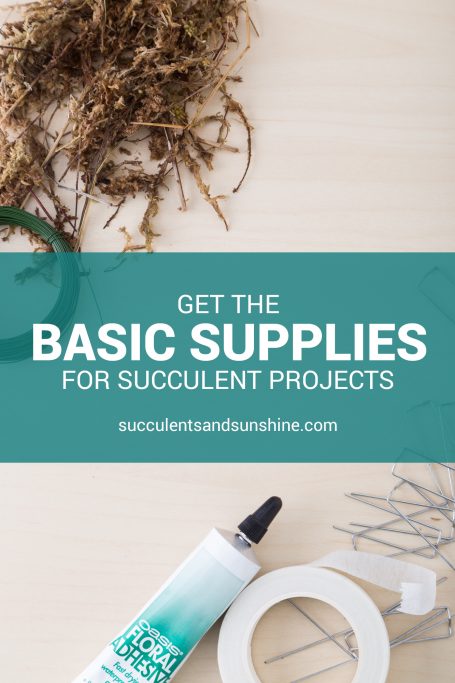
Discover what materials are necessary to commence crafting your own succulent-based projects or decorations for the home.
Some of the connections on this page could be affiliate links, meaning we would get a commission if you buy something through them. You would not be charged any more money, but these commissions help us to offer free information on the site.
Recently, I discussed the essentials of planting succulents in containers. Now, I am sharing the materials I typically use when crafting a succulent project. In my blog posts, I have noticed that I often use the same items. Therefore, if you are looking to make something creative with succulents, here is a list of items you may require:
- Replacement: Succulent cuttingsSphagnum peat mossFloral adhesiveGreening pinsFloral stringFloral cable
Table of Contents
Succulent cuttings
When I work on my projects, I always make sure to have succulent cuttings on hand. These make it easier to put together potted arrangements, while also allowing me to be creative when it comes to unusual planters. Cuttings are essential for achieving the desired effect.
You can either harvest cuttings from the plants you have in your possession or purchase them online for larger projects. For smaller undertakings, I tend to make use of the cuttings from my own plants, but for bigger ones such as a wreath, I would strongly recommend buying them.
Be sure to let the cut end of any cuttings you take heal for a few days before planting them in moist soil or moss, or else they might decay.
Sphagnum Moss
Sphagnum moss can be both a great help and a nuisance. It is ideal for filling containers, preventing soil from spilling out, and providing a nice finishing touch. However, it can be very messy to work with. Wetting the moss prior to using it is recommended, as it is easier to mold when it is damp and is slightly less messy than when dry. To ensure that projects made with sphagnum moss stay well-hydrated, it is necessary to run water over it a few times so that it can absorb the water.
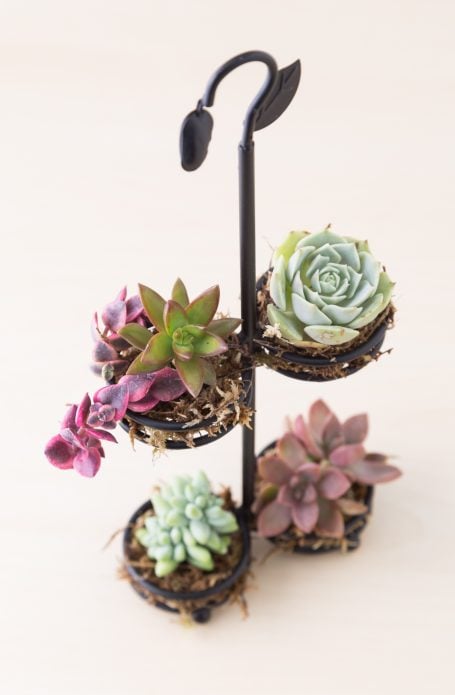
You can use sphagnum moss to help your succulents thrive in many different ways. For example, I had an old spice rack that I decided to repurpose and use for succulents. I filled each section with some sphagnum moss, then added some succulents. This arrangement looks great and should last for many months, maybe even a year. It would also make a great centerpiece for a special occasion such as a party or picnic.
My succulent wreath form has survived for more than twelve months with only sphagnum moss as a base, so succulents are capable of living for extensive periods of time with just moss. Nonetheless, if you make something smaller like a spice rack, adding some soil is recommended to make them survive for a longer duration. Even without soil, if you give them the necessary hydration, they should be able to last for a few months.
Wetting sphagnum moss can be difficult. When it’s completely dry, it will often repel water. To ensure that the moss is adequately soaked, I suggest pouring small amounts of water onto it over a period of time, such as thirty minutes to an hour. For smaller projects such as spice racks or bird cages, two or three passes of water should be enough. For larger projects like wreaths or topiaries, you may need to do five or six passes. If you don’t want to do it manually, you can put the project on the lawn during a sprinkler session.
Floral Glue
You may find hot glue to be a useful and inexpensive option for your projects. I used to rely on it quite a bit, but I’ve found that it doesn’t hold quite as effectively as floral glue. Nevertheless, if you already have it around, it can be a handy option.
What about hot glue?

The stem’s base may be coated in hot glue, but new roots can still grow at the leaf nodes (the spots where the leaves are connected to the stem) and the base of the stem.
Although it may be more challenging than in the past, you can still get your succulents to put out roots at the end of the stem. These roots will either dislodge the hot glue as they expand, or simply grow around it.
That’s amazing! Even if it doesn’t come to pass, your succulents will still grow beautifully.
I would rather use the floral adhesive because it holds succulents better.
Greening Pins
If you are creating a succulent wreath or topiary, you should consider purchasing greening pins. These are great for securing cuttings in place and can often be used instead of glue. Simply put them around the stem of the succulent or push them through the stem for an even more secure hold.
Floral Tape
If you are making a boutonniere, bouquet, or centerpiece with succulent cuttings, you’ll need floral tape. This tape is usually green, however it can be found in different colors online. The tape is used to wrap the stems of the succulents and secure them to the floral wire and to each other. This is an important part of creating a beautiful wedding flower arrangement.
Floral Wire
I’m continually amazed at the many uses of floral wire. It can be used in all sorts of creative ways – I once even used it to make some greening pins! But it’s more commonly used to make longer stems on succulent cuttings, such as for a boutonniere or bouquet. The wire is pliable yet strong enough to keep the cuttings secure.
Having the essentials for working with succulents makes the process much simpler and faster. Don’t forget to have soil and top dressings for projects that require more in-depth planting. What creative vessels have you used to plant succulents? Is there anything you used that I didn’t include on the list? I’d love to hear from you in the comments or via email!
FAQ
How do you plan a succulent party?
Reworded:
– Get your succulent party invitations ready. To start, send out succulent themed cards to your guests. …
– Select a color scheme. …
– Organize a succulent related activity. …
– Get imaginative when decorating the space. …
– Don’t forget the luscious greens! …
– Set up a unique planting station.
How do you arrange succulent arrangements?
Create a new home for your largest succulent by digging a small hole with your fingers. Gently place the roots and stem of the plant into the hole, then cover the bottom of the succulent with soil. Make sure to keep the roots intact if possible, as this will help the plant adapt to its new environment quickly.
How do you make an indoor succulent arrangement?
Re-phrased:
– Select a Pot. …
– Make Sure it has Proper Drainage. …
– Put in Potting Soil. …
– Choose Your Plants. …
– Fill the Container with Soil. …
– Place Accents and Decor. …
– Water the Garden. …
– Place in Desired Spot and Enjoy!
What do you need for a succulent party?
Rewording:
– Assortment of succulents.
– Pot for the display.
– Utilizing implements to craft the display.
– Soil combination.
– Ornamental features: stones/moss/sand.
– Directions/caring advice.
What do you need to make a succulent arrangement?
You can make your own custom succulent potting mixture by combining equal amounts of potting soil, coarse sand, and either perlite or pumice. When selecting succulents for your mix, be conscious of the light and care requirements of each type to ensure they will thrive.